Category Archives: Counting

Sidewalk Chalk Math

Yup, we’re still using sidewalk chalk A LOT.  It’s still one of my all-time favorite learning tools!  It’s a great (and easy) way to create multi-sensory learning. Remember hearing about learning styles back in college?  We all have our ideal method of learning (auditory, visual, kinesthetic/tactile).  The most efficient lessons are those that utilize each learning style.

Onto the activity…

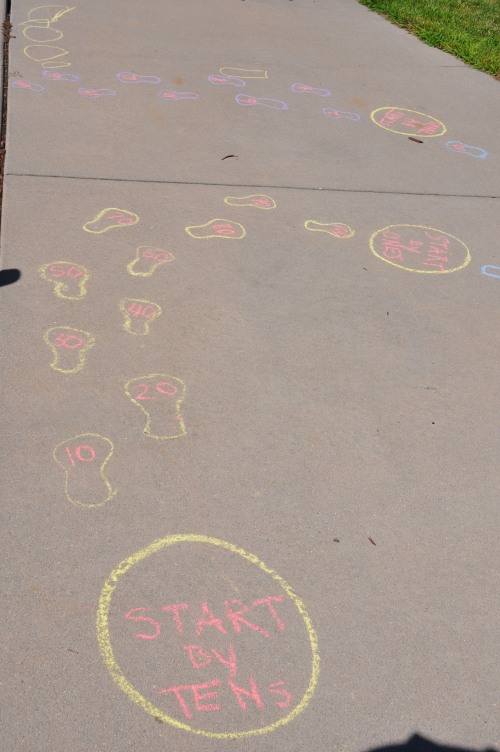
This summer, J really got into tracing his footprints onto the sidewalk.  We would trace all sorts of fun paths that he would then follow while running, jumping, skipping (or giving it his best attempt!), pushing his lawn mower or riding his tricycle.

After a few weeks of this, I decided to add some learning to the mix 🙂

First, I added a letter to each footprint.  J loved singing the Alphabet song while following his footprint path. Next was numbers, logically! That’s when I realized this would be great practice at counting by twos, fives, and tens.  I placed one number in each footprint and got J to call out the numbers as he jumped across. He actually learned a cute counting song from one of the Leapfrog movies that takes you through ones, twos, fives and tens. It works perfect with his footpaths.

This incorporates auditory (singing), visual (written numbers) and kinesthetic (physical movement with each number).

Here’s some other activities to do with sidewalk chalk.

Homemade Sunbleached Puzzles

I came across this brilliant idea for sunbleached puzzles.  They were so easy to create and great entertainment (and practice) for a puzzle-lover. It was also a great little lesson in the sun’s effects.

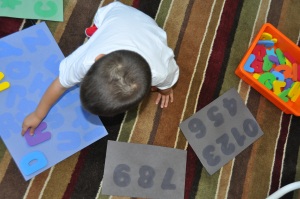
I set out foam bath letters and numbers on dark construction paper and left them to sunbathe awhile on the deck.  J enjoyed watching the process, impressed by the magical results! We then brought it all inside to start putting it all together.  You can make this activity more difficult by adding extra foam letters to the choices.

This is great practice at letter recognition.  It’s also great way to help them learn how to spell their name, memorize their phone number or address. 

The link above used magnetic letters and shape blocks to create their puzzles.  You could also cut your own shapes out of colorful foam.

Create Your Own Number Book

I remember making one of these in kindergarten.  Ok, honestly my memory doesn’t work that far back but I do remember seeing the one I made in kindergarten.

J’s is not quite as fancy but it served the same purpose and he is just as proud of authoring his very first book.  We even added it to his bookshelf and he often picks it out for us to read together!

PREP: I prefolded and stapled the pages together. (My teacher used a hole punch with rings to connect the pages.) I had a sheet of number stickers from an old workbook with both the numbers and objects to count.  This made the prep-work simple since all I had to do was pull out one sheet of stickers.  I did quickly add some stickers of like objects, cut into strips for him to count (a strip of 3 smiley face stickers, 4 stars, 5 balloons, etc.) and some individual stickers of a group of objects for him to count (a bouquet of flowers, a basket of eggs, etc).

ACTIVITY: We went through and wrote one number on each page.  I then gave him the sheet of number stickers and he matched the stickers to the correct page.  He then counted the items on each sticker to place on the correct page. We gave his book a title, “J’s Number Book” (genius I know!) and he had his very first book.

We did this activity at home while I fed baby brother.  It required very little physical help from me.  My job was basically to encourage.  This would be a great travel activity.

Counting Beads

I’m always trying to think of different uses of the same old toys.  This set of lacing beads from Melissa and Doug has found many uses, all of which have been winners for J.  This week I’ll highlight some of the ways we’ve used these beads. 

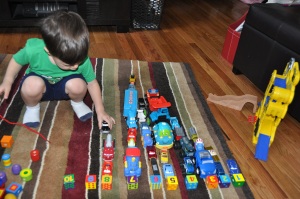
J set the number beads in the correct order and then created a “graph” of sorts by lining up the corresponding number of cars beside each bead.  In hindsight, I should have set out cars that were all similar lengths.  There was no planning involved in this activity though.  I just needed something to hold his attention long enough for me to feed his brother.  It worked 🙂

Dot Marker Counting Cards

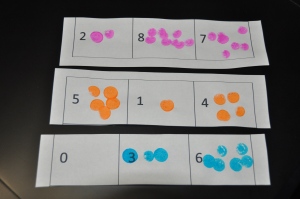
I made some quick counting cards and J used the dot markers to fill in the correct number of dots in each rectangle.  I got the initial idea at Children’s Learning Activities (I just can’t find the exact post).

This could also easily be done with stickers, stamps, finger prints, candy/manipulatives.  Change up the material you use and toddlers think you’ve given them a brand new activity!

Counting Clovers

This activity was done with no prep (it seems most of our activities this month are no prep since I’m crazy busy getting ready for a baby). 

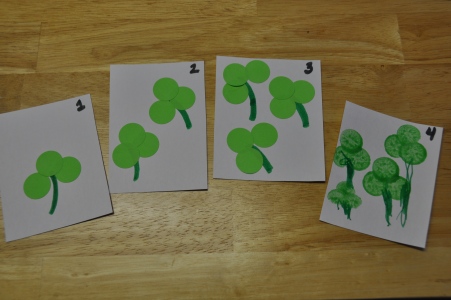
I cut out the squares while J counted how many we had ( cut out 9 of them).  We then numbered them together (and he decided to make a number line with them).  I explained to J how to make clovers using a green marker and green circle stickers.  I used directional words like left, right and above (or sometimes “on top”) when describing where the stickers should be placed.  I also used this activity to practice ordinal numbers (first, second, third). 

At first I drew the stem myself and he added the stickers.  He counted and told me when I had made enough stems to match the number written on each square.   Then he made the stems himself too.  I actually didn’t have a lot of stickers left so he also used a green dot marker to create some clovers.

Age attempted: 35 months

Homemade Game using Magnetic Pompoms

We recently played this game and I wanted to hurry and get it posted in case anyone out there was making Magnetic Pompoms to give as a Christmas gift.  All you have to do is add dice to the gift for an extra activity!

What you need:  Magnetic pompoms (or any type of marker really, dot markers, M&Ms, coins,…); Magnetic surface, Die (I found extra large foam dice at Target for $2), and your playing board of choice (you will need enough for each player to have their own board) 

How to play:  1st player rolls the die and gets to place that number of pompoms onto their board.  2nd player follows. Continue until someone fills all spaces on their board with pompoms to win.

Simple enough!  This is a good way to encourage counting and even basic addition and subtraction if wanted.  Obviously the greater number of empty spaces on your board, the longer the game will last (and the more counting practice).  You can use multiple dice at a time to encourage higher counting if your game board has enough empty spaces.  Add a color spinner for an extra element of fun and some color matching (they must use both the correct number of pompoms AND in the correct color). 

Scroll to the bottom of this link for lots of board options to choose from or you can make your own!

Age attempted: 31 months (if they can count to 6, they can play this game)

Homemade Toy: Magnetic Pompoms

When I was writing the Apple Picking post, I realized I never actually introduced our magnetic pompoms.  This has been a great homemade toy for J.  I saw it multiple places online when J was much younger and just waited until I was confident he would be safe with the small magnets.  We’ve never had one fall off, but you never know. I wouldn’t leave little ones alone with this toy until you were 100% confident they wouldn’t try a taste test.

This is a great addition to a busy box gift for older toddlers/preschoolers.  Include the pompoms, a small cookie sheet (found at dollar stores) and some blank templates and/or patterns to follow.  A great and unique toy on a budget. It would even be a good homemade Christmas gift.

To Make: All you do is hot glue magnets onto the back of pompom balls.  Use the free magnets you get in the mail to save money or buy roll of magnets from the craft store.  You won’t need an entire roll, so it can be used for other things as well.  Be sure to include a variety of color pompoms and a large number of each color.  The more you have, the more your little one can create.  You can also use multiple sizes of pompoms if you want (I’ve only made one size).  Add a cookie sheet and you have a great toy.   Something about pompoms intrigues kids.

1. They can design pictures freely. 

No my toddler did not create this picture 🙂  This is one I made for him as he called out things to create.  I forgot to snap pictures of his creations, though he makes a pretty good sun!

This homemade toy can be as simple as this and it will be worth the effort.

2. Black and white templates can be printed for them to fill in creatively.

I made this blank pompom template  for J to use.  You can also check out the links at the bottom of this post for sites I’ve found with printables.

3. Color printouts encourage them to match the correct colors.

 Here he is matching the pompoms to the corresponding colored circle in the gumball machine.  This type of activity is especially good for younger toddlers that are still working on their colors and fine motor skills.

It’s really easy to create your own, just copy and paste from Google images and add some colorful circles.

4. Patterns, sorting, counting, and colors

  I started the patterns and he found the right pompoms to continue it.  You could also show them a picture of a pattern and ask them to copy it on their own.  Preschoolers could work on much more intricate patterns or designs.

This shows some color sorting as well as our intro to bar graphs where he compared the different bars to decide which had the most/the least, which were equal,…  We finished by counting each bar to see we were right.

6. Shapes, Location
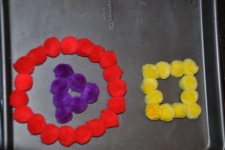
 As of now we create them together, he copies my examples (or tries to),  or he gives me instructions on what to create and where (good directional practice for them).

For older ones you can give them instructions to create a certain color/size shape, include location of the shape to increase the difficulty (ex: make a purple triangle inside the circle).

6. Letters and Numbers  

Have your little one trace letters and numbers or “write” them on their own using the pompoms.  You can draw large block letters or numbers for them to fill in with the pompoms.  They can match the correct number of pompoms next to the correct number.  Or check out the list of online templates I found. 

I’ve seen activity books for Dot Markers that would work well with magnetic pompoms.  Of course any of the templates for magnetic pompoms could also be used with Dot Markers or circles stickers too.

Other Printable Templates: 

Shapes  and Colors (from Home Grown Hearts)

Number cards (from 1+1+1=1)

Numbers (from Making Learning Fun)

Upper Case Letters and Lower Case letters (from Making Learning Fun)

B&W Pictures (From Making Learning Fun)

Color Pictures (From Making Learning Fun)

(For the Making Learning Fun templates, I had to copy the templates and paste it onto ppt to expand each picture.  When I printed these straight from the website, the circles were much smaller than I wanted.)

If you find any other great templates let me know and I’ll add them to the list!
My First Recipe Cards

I thought I’d share something that I’m giving my 4 year old nephew for his birthday busy box.  He loves to cook, so I thought we’d start helping him work through simple (VERY simple) recipes on his own.  Many of the recipes involve no actual cooking, focusing on just the basic skills of working in a kitchen (ingredients, measurements, and following steps). They are recipes that preschoolers would enjoy eating as much as they enjoy “cooking”.  I included pictures to go along with most steps to help a non-reader out.

I’m going to try to do one of the easier ones with J pretty soon. I already have some modifications in mind to make it even easier for younger ones, but I do think these will work well in their current state.

Here’s the entire set of cards. My First Recipe Cards

To prepare them, I printed them on cardstock.  I then cut along the horizontal line and folded along the vertical one to create a front and back for each card.  I then hole punched along the left side of the cards (the open side) and used two small binder rings to combine the cards together. 

Add some measuring spoons, cups, mixing spoons, a hat and apron and laminate these great toddler/preschool food charts  as a placemat and you have an easy gift for birthday or Christmas.  If their interest continues, you could easily add a few recipes to their collection each year. 

If you try it out, I’d love to hear how it goes!

Apple Picking Practice

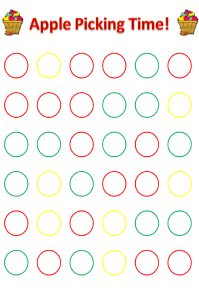
I think everyone should go apple picking in the autumn.  It’s a perfect activity for little ones.  Our trip kept getting pushed back for one reason or another throughout the whole month of October.  In that interim, I made this pretend apple picking sheet for J to work on. He uses his magnetic pompom balls (on a cookie sheet) to complete his apple picking.  I just set out a basket of “apples” for him to choose from, but I think it would be fun to add a hunt around the house for them too.  I originally saw the idea here and just adapted it a little.  After he was finished we counted the number or red, green and yellow “apples” and discussed which color had the most/least apples. 

I'm blaming the blur on my iphone!

I know apple season is over but if you want to try this activity yourself, you can print this pdf form for yourself.  It also has some apple counting and apple pattern worksheets along with it.  Apple picking and patterns

**I’m just noticing that I never posted about the magnetic pompoms, I’ll get back to you on that soon**

Age attempted: 29 months

We did finally make it to the real apple orchard.  Lots of fun!

I wish I could blame the blur on my iphone!