Category Archives: Preschool (4-5 years)

Teaching the Bible: 7 Days of Creation Introduction

We’ve finally wrapped up a series on the 7 days of creation and I am going to try and organize it into posts.  Let me just say it took us A LOT longer than 7 days!  I basically used the creation story to focus our learning time.  I never intended to get through it in one week since I also used this as the backdrop for a lot of academic activities.  I was developing and organizing as I went… as well as dealing with pregnancy, lots of travelling, lazy weeks, and distractions… so I was ok with moving slowly through it all.  You could pick and choose activities from the entire series to complete in one day, one week or one month depending on what fits your schedule.  You’ll see that what fit our schedule was spreading it out over months (we started last summer and ended in the winter).

This was not our only Bible lesson during these months.  But it became a great backdrop for so many other Bible stories we learned during the same time.

My goal was to teach J about the greatness of God as expressed through His creation (or honestly to breach the surface of that topic, since the greatness of God simply can’t be covered in its entirety even in a lifetime of learning!).  I also wanted to couple the greatness of God with the truth that this same God created, knows, loves, helps, and has plans for J too…. a truth that I just find amazing.

My current plan is one Creation post each week, so I should be finished 7 weeks from today.  We’ll see how long each post becomes.  I might have to split some up to simplify things a bit.  I used crafts, games, discussions, memory verses, books, and whatever came to mind that would work for each day of creation.

I hope you enjoy and find some of it useful!

Shaving Cream Landforms and more

I’m attempting to record all our favorite activities that I just never got around to writing about.  This is one of the activities we did as part of our focus on Creation.  I was hoping to do a whole series of posts on our Creation activities.  But since it’s been almost 2 years and I still haven’t gotten around to the task, it’s pretty safe to say it’s not gonna happen.  Our landform activities were simply too fun not to share though!

We were talking about how God created the land and focused awhile on the different types of land we see. I was using the Creation story to fulfill our “science” activities.

I chose 5 or 6 landforms (it’s been awhile so I can’t remember exactly) to focus on and printed one photograph and one illustration of each. I found all the pictures online. It would probably be a good idea to laminate these. Our pictures certainly got messy.

Matching– First I had J match the illustration to the corresponding landform photo.  This is a great way to practice matching for any category, especially if your child has no trouble matching 2 pictures that are the same.

Here he is showing off our mountains

Shaving Cream fun I brought out the shaving cream and we created our own examples of the landforms. Warning – you will use A LOT of shaving cream if you truly want to make quality landforms. 🙂 I bought a can at the dollar store. J was 2 years old when we did this activity and did need some help making a few of the landforms. TIP: it’s a good idea to start with the mountains!

After all the landforms were made, J “labelled” each with the correct picture.

The photo doesn’t do our foam world justice 🙂
Of course he had tons of fun digging in the “dirt” too!
 We threw in some bath foam fish, nothing to do with landforms but he liked it.
Landform Obstacle Course – For our last landform activity, I set up an obstacle course in the living room.  Pillows on the floor were islands that he had to hop on. Pillows stacked on a chair was our mountain. A blanket thrown over the table created our cave. I pushed the couch up to the chair to create a “canyon” in between.  We talked about each landform in the obstacle course and went on a “bear hunt” through the obstacle course.  It’s so much more fun moms if you join in the climbing and hopping! And finally we played a game where I called out a landform and he had to climb, crawl or hop to it.  Lots of fun!

Reading with Inflection

Back when I taught middle school kids I was so surprised that mood was completely lost on so many students.  They read in a monotone, word by word manner. No wonder they found it boring!

I definitely don’t want J to get stuck in that rutt.  Reading is way too much fun for monotone.

So I was THRILLED when we discovered Mo Willems at our local library.  His books are perfect for teaching and practicing inflection, even for the beginner or intermediate reader. And it doesn’t hurt that he is hilarious for both child AND adult.

We are in a book! [Book]We especially love his Elephant and Piggie series. In fact I liked “We are in a Book” so much that I decided to go out and buy it and I’m becoming quite the snob in books I deem worth my money.  “BANANA!!!” has become a source of laughter all throughout our day (you’ll have to read the book to find out why).

There are so many great things about these books. They are simple enough that J can read them all by himself but the story is still good enough to keep both of our attentions. So many of the beginning reader books are boring! These books aren’t marketed as beginning reader books, but I think they work great for that… or maybe for intermediate readers. I’m not an expert in early readers! If your child has a good base of sight words and a basic understanding of phonics, I think they will manage the Elephant and Piggie books well.

We can also read them together, each taking a different role so that we get to act the book out. J even wants us to imitate the faces as we read/act.

Should I Share My Ice Cream? [Book]He has learned what think bubbles are and is getting great practice at reading with inflection which I just love. It’s so fun to hear J imitate the emotion and read happily, sadly, with disappointment or surprise, disgust, greed, embarassment, or even dismay, all depending on the story. That is such great practice! Willems does a great job of showing the emotion on the characters faces as well as changing the font to get the mood across (tiny font or gigantic font, italics, wiggly font, etc). Even my 3 year old can figure out it out, many times on his own!

And of course he’s getting great practice at how to interpret the punctuation as he reads. Often J can pick up the purpose of the punctuation or font type on his own from the context of the story. There have been times that he’s asked why the font was so tiny or why the exlamation mark and the question mark are together.  Another plus! The books encourage him to take the initiative so that he gets it right.

And did I mention that these books are funny? J and I just giggle the whole way through. I love that he is getting such great practice reading AND enjoying every second. I’m so thrilled that Willems wrote so many books in this series. We’ve probably read at least 10 different Elephant and Piggie books and have lots more to check out at the library.

Oh and his Knuffle Bunny series is really cute too. That’s actually the series that got us hooked on Mo Willems. Parents especially will find this series humorous. “Blaggle Flaggle” mom and dad, “Blaggle Flaggle!”

 **Willems also has a the Cat the Cat series (seems to be ideal for very early readers since he uses lots of repetition and use of the same word family throughout the book) and the Pigeon series (that will be next on our list to read through).

My Little Helper: Dresser Labels

In the months leading up to my due date, I worked at getting J a little more independent.  Just a few of the things we worked on: dressing and undressing, what goes in the dirty clothes hamper (and what does NOT go in dirty clothes hampers!), and finally putting away his clean laundry.

I decided to place labels on his dresser drawers to help in this process.  I created them in ppt, using clipart and Google Images to add pictures since J can’t truly read yet.  Then, I printed them on cardstock and laminated them with clear contact paper.  Finally, I placed them on the correct drawer.  These have worked great.  It made picking his clothes out in the morning and returning his clean laundry a fun and independent task.

**ETA: J did this well for 5+ months.  Just a few days after writing this post, J had the dresser fall on him while getting his clothes out in the morning.  I made 2 mistakes… 1) The dresser wasn’t anchored to the wall (it is now… it and all the other furniture in the house!). J wasn’t a climber so I just assumed we wouldn’t have a problem. Wrong. 2) I didn’t think to explain the step by step instructions of how to properly use a dresser.  I have since taught him that you must close one drawer before opening another or the dresser becomes unstable.  It never even occurred to me to teach that.  Don’t make my same mistakes! Oh, and J ended up being fine, thank the Lord for His protection! **

Since it meant just a tiny bit more work, I went ahead and made labels for the nursery too.  God must’ve known that these labels would be necessary.  I ended up with an emergency c-section, got home to a 3 level house and not able to use the stairs but once a day.

These labels made it so easy for my husband to find things easily.  Anyone else have a man that can be told exactly where the ketchup is but not be able to find it until you walk over and point it out to him?  “Oh, you meant the top shelf.” – “Well that’s what I meant when I said ‘The ketchup is on the top shelf.'”  I think it’s a universal falty circuit wire in the male population.  My dad and brother do the same thing.

The labels worked wonders! Without them, he would’ve been in that nursery looking for the extra sheets or burp clothes forever, despite my instructions.  I would’ve had to trek up there just to point them out.   They worked so well, I almost wanted to put labels on all the other cabinets in the house.  It sure could save a lot of repetitive instructions.

Click on the link below to open the pdf files of my labels.  They include the generic things: shirts, pants, socks. etc; or swaddles, onesies, diapers, etc for the nursery.

Nursery Labels                                                                               Boy Labels


(I don’t have any girls, so you won’t find girl attire on any of the labels.)

Chalk Roads

While writing the last post on sidewalk chalk math, I realized that I never posted about our outdoor chalk roads (or at least I can’t find the post!). This was something J did practically every day just after his little brother was born.  It allowed for outdoor play, kept him centralized to one place, and kept him well occupied with his love for all things cars!

Overtime his road system became more and more elaborate, adding specific stores, airports, parks, and parking lots to the roads just made it all more fun.  He is also becoming more capable of drawing his own roads.

If it’s too hot outside, check out our indoor version of the activity, Homemade Highways!


Sidewalk Chalk Math

Yup, we’re still using sidewalk chalk A LOT.  It’s still one of my all-time favorite learning tools!  It’s a great (and easy) way to create multi-sensory learning. Remember hearing about learning styles back in college?  We all have our ideal method of learning (auditory, visual, kinesthetic/tactile).  The most efficient lessons are those that utilize each learning style.

Onto the activity…

This summer, J really got into tracing his footprints onto the sidewalk.  We would trace all sorts of fun paths that he would then follow while running, jumping, skipping (or giving it his best attempt!), pushing his lawn mower or riding his tricycle.

After a few weeks of this, I decided to add some learning to the mix 🙂

First, I added a letter to each footprint.  J loved singing the Alphabet song while following his footprint path. Next was numbers, logically! That’s when I realized this would be great practice at counting by twos, fives, and tens.  I placed one number in each footprint and got J to call out the numbers as he jumped across. He actually learned a cute counting song from one of the Leapfrog movies that takes you through ones, twos, fives and tens. It works perfect with his footpaths.

This incorporates auditory (singing), visual (written numbers) and kinesthetic (physical movement with each number).

Here’s some other activities to do with sidewalk chalk.

Pouring Practice

Simple pouring practice kept my J occupied for 2 hours.  He was soaking wet by the end of the two hours but had so much fun (apparently he needs a little more practice before I hand over the milk).

We did this activity inside (it was BRUTALLY hot outside).  TIP: I bought a waterproof tablecover to lay down for activities like this. It’s more sturdy than a tarp, so it stays in one place easily.  And it does a great job in trapping the water so it doesn’t hit my new wood floors! We also use the tablecover when finger paiting inside and under the pool for our indoor snowbox. It’s more expensive than a towel or simple tarp but worth the expense in my opinion.  And we can always use it as it’s intended too! 🙂

I gave him two trays (found at Target) a bowl of water and some different containers.  I asked him to pretend each container was a cup that needed to be filled with the water before setting the table for dinner.  I would’ve used real cups, but every single cup in my house was in the dishwasher.  Btw, how do 3 people go through every cup in the house in such a short time???  Toy tea sets would work perfectly for this.

My goal was for him to learn when to stop pouring to keep the “cups” from overflowing.  He tends to pour until the water hits the very tip of the cup which of course makes spilling guaranteed.  I used this to teach him when to stop pouring.

Was this a successful lesson, well yes and no.  Yes, he learned how to do it “right” but he didn’t necessarily enjoy doing it right.  He would much rather pour until it spills!

After the pouring practice, he just played and played and played.  I was so surprised he stayed focus for so long.  I just added some new utencils or containers every half hour.

Waterplay utencils that J finds entertaining:

  • medicine droppers and dispensers
  • measuring cups and spoons
  • bottles
  • milk carton with holes poked in the bottom (to create rain showers)
  • nasal aspirator
  • tubes
  • funnels
  • baster
  • squirt bottle
  • serving tray
  • muffin pan
  • ice cube tray
  • flask
  • tea kettle
  • bowls
  • buckets
  • paint brush
  • water wheel
  • sponge

What utencils does your little one like to play with in the water?

Ice Cream and Popsicle Patterns

I came across some foam ice cream and popsicle stickers in Target’s dollar section.  They were too cute to pass up.  I thought they were perfect for summer and was sure to put them to good use.

 **If you can’t find them at Target anymore, it would be simple to cut out similar foam shapes.**

I created pattern cards as one activity using the popsicle stickers.  Beforehand, I began both color and shape patterns on cardstock.  I then gave J the pattern cards and a bowl of the extra stickers to continue each pattern.  

With the ice cream cones, I created different color combinations for him to mimic.

After already creating my pattern cards, I thought it would be really cute to have made multiple dips on each ice cream cone for him to mimic.  Opportunity missed on that one!

Btw, J just set the stickers in place so that we could redo the activity again.

Create Your Own Number Book

I remember making one of these in kindergarten.  Ok, honestly my memory doesn’t work that far back but I do remember seeing the one I made in kindergarten.

J’s is not quite as fancy but it served the same purpose and he is just as proud of authoring his very first book.  We even added it to his bookshelf and he often picks it out for us to read together!

PREP: I prefolded and stapled the pages together. (My teacher used a hole punch with rings to connect the pages.) I had a sheet of number stickers from an old workbook with both the numbers and objects to count.  This made the prep-work simple since all I had to do was pull out one sheet of stickers.  I did quickly add some stickers of like objects, cut into strips for him to count (a strip of 3 smiley face stickers, 4 stars, 5 balloons, etc.) and some individual stickers of a group of objects for him to count (a bouquet of flowers, a basket of eggs, etc).

ACTIVITY: We went through and wrote one number on each page.  I then gave him the sheet of number stickers and he matched the stickers to the correct page.  He then counted the items on each sticker to place on the correct page. We gave his book a title, “J’s Number Book” (genius I know!) and he had his very first book.

We did this activity at home while I fed baby brother.  It required very little physical help from me.  My job was basically to encourage.  This would be a great travel activity.

Beads and Dot Markers

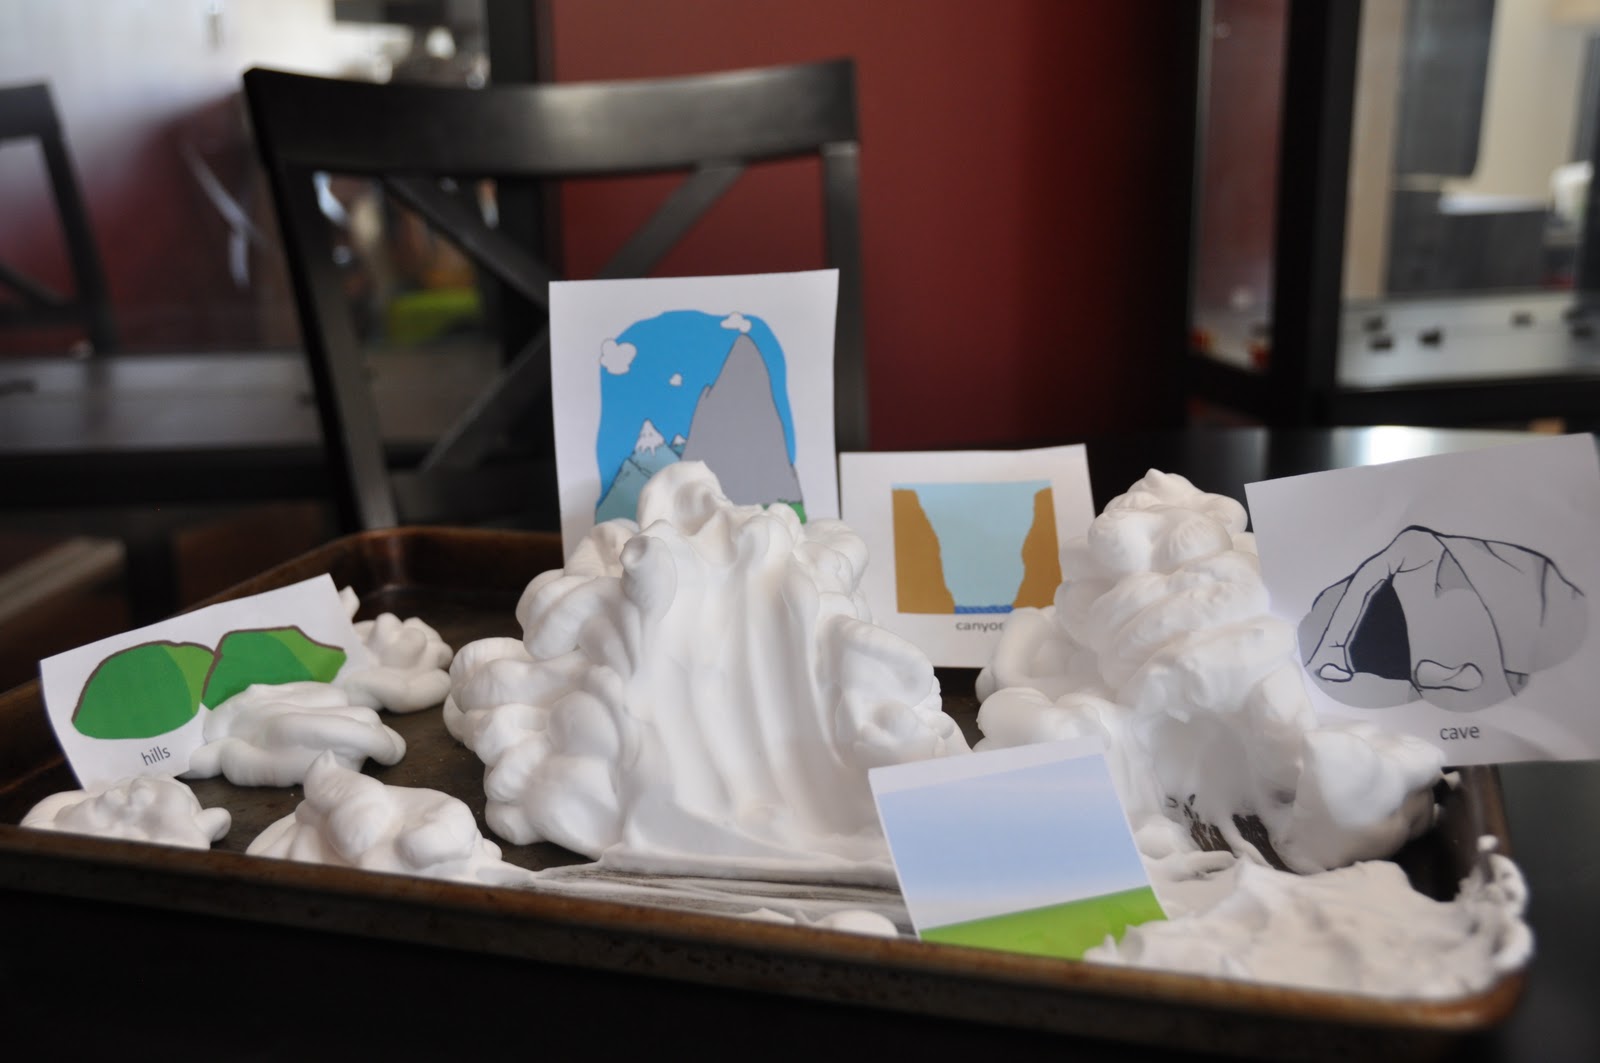
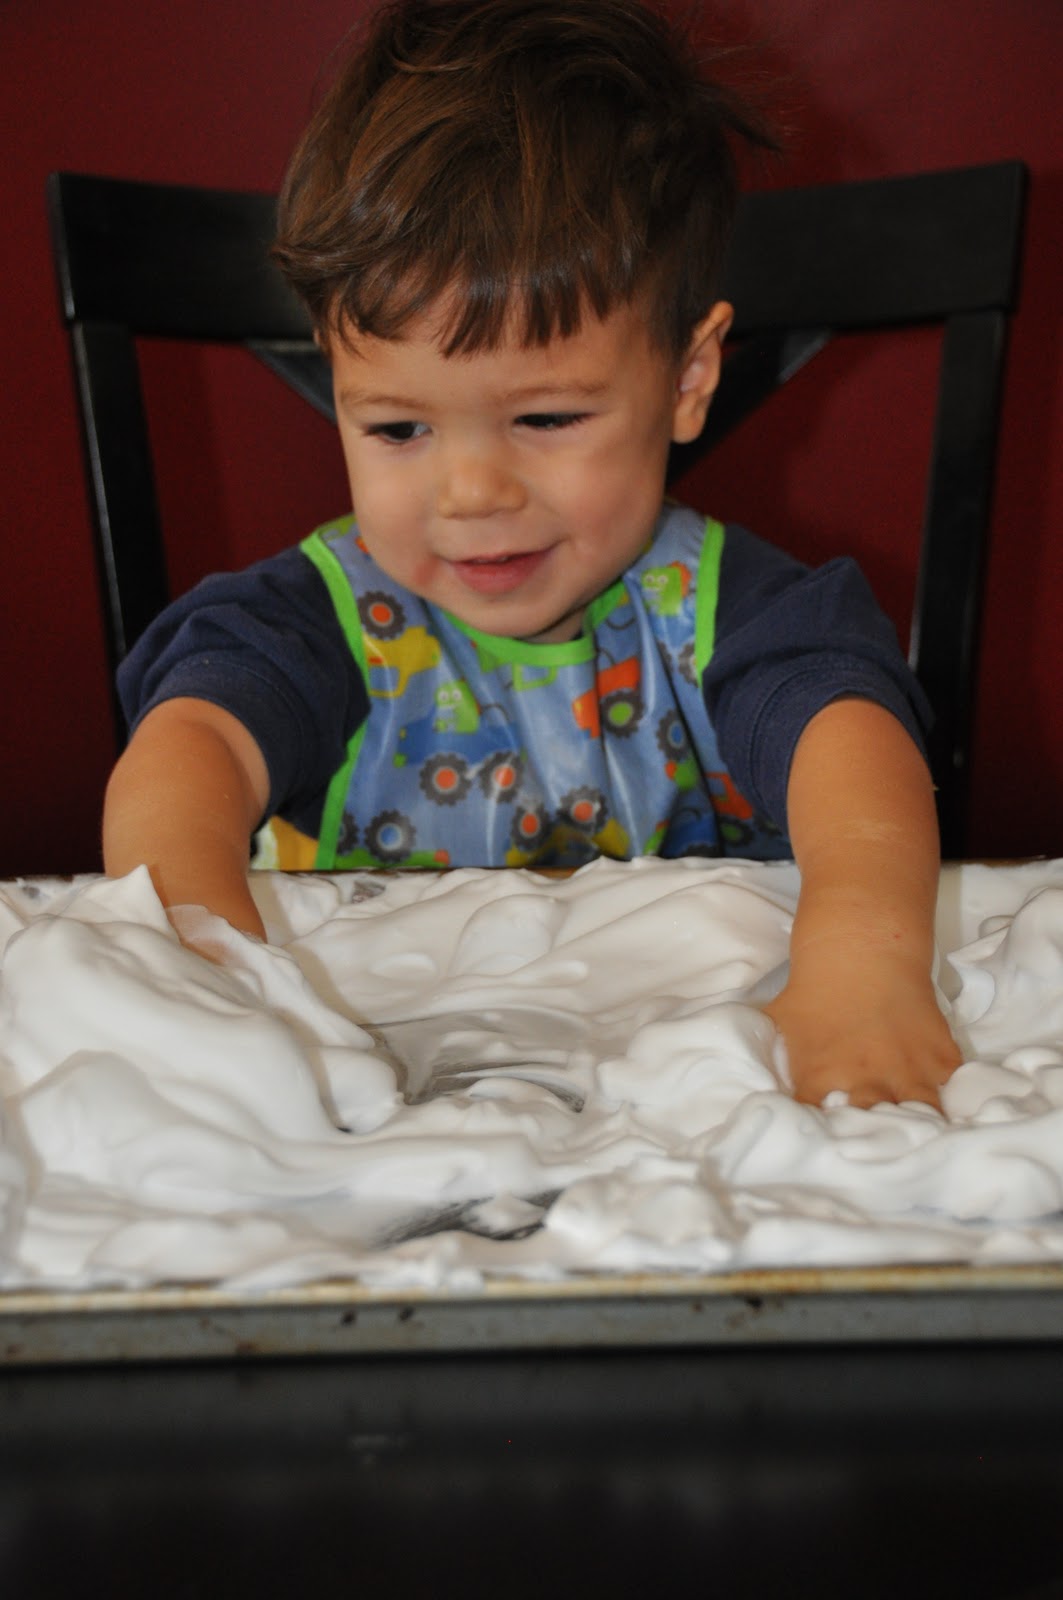
This week is all about finding multiple uses out of these beads from Melissa and Doug. 

Here’s our last activity using Melissa and Doug’s Lacing Beads.  This is a quick one, but one that kept J entertained for awhile.  Basically I just reused yesterday’s activity, but used dot markers instead.  I set out a few of the multi-colored lacing beads for him to create with the dot markers.

J loves dot markers.  They are a hit everytime I get them out. 


J started just playing around on the yellow, orange and red square and decided to cover the entire thing with red dots 🙂