Tag Archives: Cooking

If you DON’T like traditional shape cookies, try these!

I never posted about our Christmas cookie baking, but we sure did A LOT of it.  I think baking is one of those activities where they can learn a lot (if we slow down enough to let them) and where they see a great reward for their efforts. 

Of course it’s easier, cleaner and faster to mix up the cookie dough on your own, but I’ve found that the majority of learning comes from allowing J to help mix the dough.  He “reads” the recipe, gathers the ingredients and then measures them, allowing him to practice tons of skills. 
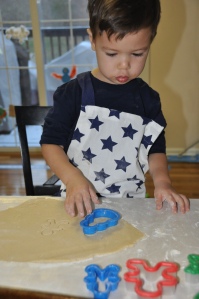
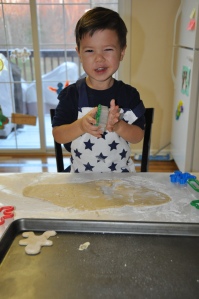
We of course made the traditional sugar cookies where we rolled the dough out, J cut them into fun shapes and then decorated to his hearts content.  This is NOT my favorite type of baking!  J loved it, but it’s honestly quite stressful to me.  I try to stay calm, but I’d just rather not deal with the rolling and the cutting.  I think J would have as much fun with playdough and mom wouldn’t have the mess afterwards. (And I don’t even like the taste of this these cookies either!)

We honestly might stick to playdough in the future. BUT all cookie baking is not lost.  We did have lots of fun baking other types of cookies (or I should say we BOTH had fun with other cookies).

My favorite type of cookies to make with J this year were those with a “surprise” inside.  Once I realized how perfect these were for J’s age and ability level, this is mostly what we made to give away to neighbors and teachers. 

I scooped the dough onto the baking sheet and J pressed each ball with the back of a teaspoon, creating a small hole.  He could then “bury” a surprise inside each cookie and I helped him cover it up with the dough.  This was right at his ability level and he loved it.  We buried Rolos, Reeces Pieces, Reeces PB Cups, Chocolate Kisses, and M&Ms (not all in the same cookie!).  I also let him sprinkle crushed toffee and confectionary sugar on top of some which he liked. 

And the good news is they taste great afterwards.  You can hide them in basically any type of cookie dough and it will taste good. 

Age attempted: J first helped with Christmas baking when he was 20 months; this year at 32 months he could do A LOT more

So here are some of the recipes we tried for Christmas:

Million Dollar Caramel Cookies (These were by far my favorite!)

Snowball Surprises

PB Surprise Cookies (basically chocolate chip cookie dough but hide PB cup, M&Ms, Rolos, whatever candy you want inside)

Molten Lava Cookies

**I hope these are the same recipes I used; I just did a online search for the names of each, but the pictures looked very similar in all cases… that should count for something right!**

Snow-themed Breakfast (or snack)

Since we woke up with tons of snow and dad got to stay home this particular morning, I decided to break the rules and have fun with breakfast. I can’t say this is the healthiest breakfast, but it was a fun twist to our normal routine.  I say there’s nothing wrong with letting our hair down a little!

I made Snowman donuts, marshmallow snowflakes, a bucket of snow (yogurt topped with nuts and berries) and snowman soup (aka hot cocoa). 

J thought it was lots of fun and of course finished EVERY bite.  Surprise, surprise!

To make the Snowman Donuts:

I used a Cheeto for the nose (the original post  used an orange slice which would be the healthier way to go), chocolate chips for the eyes and mini chocolate chips for the mouth.  These were just set on top of the powdered donut, so of course they fall apart easily.  Check out the original idea here to see a more lasting version. I decided to take the easy route and J had no problem deconstructing it as he ate.  This is also something you could get an older child to help with.  Lining up the tiny chocolate chips would’ve been too difficult for J at this stage. 

To make the Snowflakes:

Use toothpicks to attach the mini-marshmallows together in whichever snowflake design you want.  I’ve also seen this done with gumdrops.  Again, older ones could help create these too.  J could likely accomplish a toddler version of this, but I also envision him stabbing himself with the toothpick while forcing it through the marshmallows!

Other ideas are for your snow-themed meal :

Snowballs (boiled eggs… this was on my list for breakfast until I realized DH ate all of them!)

Snowman on a stick (a good way to include some fruit)

Snowman Rice Crispie Treats 

Snowball Surprise Cookies

Our other snow-themed activity for the day was Snow-Painting and I’m happy to report it’s a success with two year olds too. 

A few changes this year were more colors, two trays of snow (both needed to be refilled a few times), and medicine droppers along with paint brushes and sponge brushes.  The medicine droppers were huge hits (which I love because it adds fine motor skill practice).  In all honesty, he spent about 15-20 minutes on actual painting and another 20-25 minutes on color mixing (I even replinished the colors for him since they eventually all turned brown).  But he was occupied and having fun!  I did have to remind him how to paint in the snow because he got frustrated at first (you can’t make simple strokes but have to dab the snow).  TIP:  I use a waterproof table cover as a “blanket” to protect my floors.  It’s worked great for 2 years and keeps my floors nice (last year cheap linoleum and this year nice hardwood floors).

My Little Chef: No Bake Holly Cookies

J and his grandma made these cute no-bake Holly Cookies for Christmas.  They turned out really cute and created minimal mess (my favorite, especially during the busyness of Christmas). 

INGREDIENTS

  • 30 Large Marshmallows
  • 1 tsp vanilla
  • 1/2 stick of butter
  • 4-4.5 cup cornflakes
  • 2.5 tsp green food coloring
  • 1 package of Red Hots
  • 

WHAT YOU DO:  

  1. Melt marshmallows, vanilla and butter in bowl together in the microwave (or in double broiler).
  2. Stir in food coloring and then add cornflakes, covering all with the green marshmallow mixture.
  3. Scoop individual servings on wax paper. 
  4. Add 3 red hots to each scoop.
  5. Let them set before serving.

Reindeer Sandwich

This is a fun addition to lunchtime.  It’s so easy and your toddler will enjoy it.  Simply add two antlers (pretzles), two eyes (raisins or chocolate chips) and a red nose (red M&M) to a sandwich.  Of course as soon as J saw his sandwich he requested mom to sing Rudolph the Red Nose Reindeer again and again and again… so be prepared!

Pilgrim Cookies a Toddler Can Make!

I saw these pilgrim hat cookies and thought they were adorable and something even a toddler could accomplish.  I did make a few quick changes from the original I saw here.  Their cookies were more accurate and cuter, but a few changes meant J could be that much more involved (and truth be told, I don’t think I could’ve iced a buckle so small). 

We used yellow Reeces Pieces for the buckle instead of the yellow icing and I went with a chocolate covered cookie instead of the ginger snaps (because I don’t like ginger snaps so much!).  I did try cutting a marshmallow for the white band around the middle, thinking J could create every part.  I couldn’t get the marshmallow to look right, so I scrapped that.  Maybe someone else has good luck with it though.

TO MAKE:

You need: 

  • small brown cookies (I used Archer Farms “Dark Chocolate & Caramel indulgent cookies from Target, just 8 in the box, so good for a small group)
  • Small Reeces Peanut Butter Cups
  • Yellow Reeces Pieces (or M&Ms)
  • White icing

What you do:

  • Squeeze a drop of icing onto the center of the cookie.  Stack the Reeces Peanut Butter Cup on top (upside down).  Line the base of the RPC with white icing.  Use the icing to “glue” the yellow Reeces Pieces on as a buckle. 

These cookies were really good and REALLY rich (dark chocolate caramel cookie with Reeces Pieces AND Reeces peanut butter cup…. not really part of any diet).  I had some friends try them and they loved them too.  I’m thinking I’ll get the kids working on these the morning of Thanksgiving so they can have a part in preparing the meal (the best part of the meal… dessert!). 

They have the side benefit of providing the opportunity talk about the origin of Thanksgiving.  I used it as a review of who the pilgrims were. 

Age attempted: 31 months

My First Recipe Cards

I thought I’d share something that I’m giving my 4 year old nephew for his birthday busy box.  He loves to cook, so I thought we’d start helping him work through simple (VERY simple) recipes on his own.  Many of the recipes involve no actual cooking, focusing on just the basic skills of working in a kitchen (ingredients, measurements, and following steps). They are recipes that preschoolers would enjoy eating as much as they enjoy “cooking”.  I included pictures to go along with most steps to help a non-reader out.

I’m going to try to do one of the easier ones with J pretty soon. I already have some modifications in mind to make it even easier for younger ones, but I do think these will work well in their current state.

Here’s the entire set of cards. My First Recipe Cards

To prepare them, I printed them on cardstock.  I then cut along the horizontal line and folded along the vertical one to create a front and back for each card.  I then hole punched along the left side of the cards (the open side) and used two small binder rings to combine the cards together. 

Add some measuring spoons, cups, mixing spoons, a hat and apron and laminate these great toddler/preschool food charts  as a placemat and you have an easy gift for birthday or Christmas.  If their interest continues, you could easily add a few recipes to their collection each year. 

If you try it out, I’d love to hear how it goes!

My Little Chef: Avocado Black Bean Salsa

I have no clue where I got this recipe, but it’s great for toddlers and really pretty healthy. 

Avocado Black Bean Salsa

INGREDIENTS
1 avocado
1/2 can black beans (drained and rinsed)
1/2 tomato (diced)
cilantro to taste
salt to taste
lime to taste

DIRECTIONS

Basically mix all ingredients together until you get the flavor you like.  The amounts can definitely be changed according to your own tastes! 

I serve this in tortillas, like a burrito, or in pita bread for lunch.  I’ve served it as a dip with tortilla chips for an afternoon snack (when I thought J needed an extra serving of fruits or proteins).  You can easily add some finely chopped spinach (precooked) for veggies or diced chicken.  It would also go well with Triscuit crackers I think.  J loves it.  I love it. 

24 months

Today it dawned on me that it’s an easy enough recipe that J could help (and pretty much make it entirely himself).  I just cut up the tomatoes and the avocado before he joined me.  He dipped the avocado into a bowl, added the beans and tomatoes and stirred them all together.  I didn’t have fresh lime or cilantro, so he squeezed some lime juice out of a bottle and shook the cilantro out of the spice container.  We added the salt together (so he wouldn’t shake the entire jar into the dip!).  He could even spoon the salsa onto the tortilla and help roll it up! 

The reward is immediate, so there’s no question in his mind that he helped create the meal. 

As a side note, I included a little science with today’s cooking too.  I happened to have an extra avocado and tomato, so I kept them out for him to feel.  We described the textures of the fruits and then I showed him what the inside of each looked like (pointed out the color, the texture, the seeds in each). 

My Little Chef: Bean & Cheese Chips

J often helps me in the kitchen.  Cooking is one skill that I want all of my children to have.  The don’t have to be culinary experts (they certainly won’t get that training from me!), but know enough to prepare tasty, healthy meals for them or their future families.  Cooking offers a ton of teachable moments.  Science, math, reading, motor skills, … those are the first things that come to mind.

This “recipe” is perfect for a toddler.  J is fully involved and feels fully responsible for the end result.  It’s also a great way to sneak some protein into an afternoon snack.  I tend to offer this snack when he’s hasn’t been too impressed with the proteins offered during the previous meals.  I have also used this as a quick lunch, but since it does include tortilla chips, I try to keep it a snack.  I grew up with this as a child friendly appetizer on Enchilada night. 

The recipe (if you can call it that) is …

INGREDIENTS

  • Bite size tortilla chips
  • Sliced Cheddar Cheese (or any cheese you have!)
  • Refried beans

DIRECTIONS:   Lay out chips on baking sheet.  Place a spoonful of beans on each chip and top with cheese.  Broil until cheese is melted. 

I use this recipe to help J practice understanding and following instructions.  I lay out the baking sheet and a plate of chips.  I tell him to lay out X amount of chips on the baking dish.  This is great counting practice for him.  When he’s a little older, I can ask him to lay them out in a particular shape or even a simple line as extra practice in motor skills.  As he lays each chip out, I cover it with the refried beans (he’s not quite ready for this step).  I then tell him to cover each chip with the cheese slices.  We play a little “I Spy” here to help him complete the task.  (“I spy 2 chips that need cheese!!  Can you find them? Where are they? Yeah, you found one!”)  Then we place them in the oven, discuss how the oven is hot and just like heat melts snow, it can melt cheese too! 

It doesn’t take long for them to “cook”  and cool enough to eat, so he gets a quick reward for his efforts.  Out of all the dishes he helps cook, this is the one he most understands he had a hand in its creation. 

Age Attempted: 22 months, could be done earlier

Try Again?  This will be used many more times I’m sure.

Snow Cream

Winter continues.  I think all parents get a little tired of being stuck inside right around this time of year.   The good thing is I’m getting to try out lots of activities with J.  With the unusual winter we’re having, many of those activities involve snow.  I brought out the snowbox again today and J played for a full hour.  

This afternoon we tried snowcream for the first time.  Yes I had never tasted it either, being a true southerner.   Honestly, I had never heard about it until this year!!  So I googled it to find a recipe and J and I mixed up a batch together.  J helps me cook or bake each Friday; this was by far the easiest thing we’ve made together.  He helped me pour the sugar, vanilla, and milk into the snow.  Using specific directions like “fill the cup with sugar” or “empty the cup” is always good reinforcement.  Of course he also helped stir until it looked just right!   He loved it…. eating it that is.  I mean really loved it.  I think he would’ve eaten the entire half gallon had I not stopped him. 

Here’s the recipe:

INGREDIENTS

  • 1 gallon snow
  • 1 cup sugar
  • 1 Tbsp vanilla extract
  • 2 cups milk

You'll need these ingredients.... plus snow!

DIRECTIONS:  Collect snow as it falls inside a bowl.  Add sugar and vanilla to taste and then add milk until you see the right consistency.

The recipe is from allrecipes.com http://allrecipes.com/Recipe/Snow-Ice-Cream-II/Detail.aspx

**I made only about half a gallon and think I added too much sugar (half a cup). It was VERY sweet!  I’m sure that’s one reason why J loved it so much!  Next time I will start with less sugar and work up. 

22 months

Age Attempted: 22 months

Try Again?  I’m sure this will become a special snack each time it snows!  As he gets older he can measure out the ingredients and eventually read the recipe too.

Vroom Vroom Pudding Painting

17 months

Today I decided to pass the time making a big huge mess. We painted with pudding on the kitchen floor…well on butcher paper taped onto the kitchen floor.  I turned it in a whole afternoon event, first we made the pudding together (and the mess started).  It’s a great cooking activity with quick results!

Then I stripped him down to his diaper, taped some butcher paper onto the floor and set out a plate of pudding with some of his toy cars.  We drove the cars through the pudding and then down the paper.  After awhile we painted with our fingers (and yeah, I had to show him to use his fingers since he tends to be a pretty clean little boy).

This is a great form of finger painting even when they’re little since it’s completely edible.  J is not one to put anything and everything into his mouth, so he actually didn’t even realize the paint was so tasty until maybe 15 minutes into the activity.  Of course once tasted, the painting was temporarily halted (until his belly was full).  He absolutely loved pudding paint. He did some slipping and sliding, got a sugar rush, and creating a big mess.  All the makings for a perfect afternoon!

Clean up was interesting. Lesson learned: have a plan to get baby from kitchen to tub w/o tracking pudding through the whole house (or all over my clothes). We ended up taking a quick bath in the kitchen sink and then finished upstairs in the tub.

See the mess I had on my hands!

Age Attempted:  17 months; could be done earlier since the paint is edible

Try Again?  It does take some prep and there is obvious clean up with this activity but I think it’s worth it for a special activity every few months