Monthly Archives: January 2011

Valentine’s Past

We really haven’t done a ton of things incorporating Valentine’s Day in past years.  Most of our activities center around making cards or expressing our love for others (which afterall is the purpose!). 

Here’s some homemade cards/artwork we’ve given in combination with Valentine’s Day.  Click on the photos to see more about each activity.

Heart Suncatcher

Visual Valentine

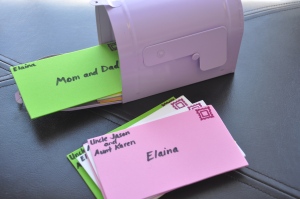
Playing Mailman

(This is not a card, but a fun activity to incorporate into Valentine’s Day.  This is a great time to find small mailboxes in the stores for future use too.  I recently saw some cute foam mailboxes at Target for $5, a make-your-own mailbox in Target’s dollar section, and metal mailboxes like in the photo below at Michael’s Craft Store)

For a few more ideas, check out our  homemade cards and homemade gifts too!

Homemade Gift: Magnetic Foam Frames

J made these to give to some of our family as a Christmas gift.  This was a homemade gift he could feel completely responsible for and KNOW that he created it himself. 

Materials: Foam, Magnetic plastic frame (from dollar store), Stickers, Buttons, Googly Eyes, Post-It Notes, Glue

Prep: I cut out the foam frames and gathered materials for J to choose from to create his gifts. **You can also buy prepackaged foam frame crafts and just add the fridge photo magnet on the back yourself.**

We had 4 frames to complete as gifts, so J chose the color for each recipient and the materials to decorate it with.  This also meant that one set of materials weren’t used (he didn’t choose the googly eyes this time).  I helped make sure he was spelling his name correctly on frames (all except one, which he declared was for Grandpa and would hold a picture of Grandma since he loved her so much… hence no need for J’s name on the frame!).  The only other involvement I had in the process was some encouragement to practice creating a pattern with the buttons.  He’s all about patterns right now though so not much need to push with that!

He also didn’t complete all the frames at one time.  After he finished a couple and chose the materials for the others, I packed some up for him to complete on the plane.  This was a great activity to do on a plane, little packing, light-weight and kept him focused.

I was so surprised to see how symmetrical he designed the frame with bubble stickers, maybe he’s finally getting out of that stage where he wants to stack stickers on top of each other! 

After everything had dried, I glued a magnetic frame (bought at a dollar store) onto the back so the frames could be placed on a fridge and photos could be traded out easily. **Be sure you don’t glue the frame closed so that photos can be changed out later.**

Age attempted: 33 months

Flying with an Infant

Since we are often flying the friendly skies (between 6-8 trips per year which comes out to about 12-18 plane rides yearly), I thought I would share my thoughts on flying with J at each age. J’s first plane trip was at 6 weeks and he now has his own frequent flyer card.   I will certainly acknowledge that the frequency of our travelling really helps when it comes to his behavior both in the airport and on the plane.  He knows what to expect, he knows what we expect, and he knows what will happen if he breaks the rules.  Of course he wasn’t born this way.  It’s been a learning process for us all (and we’re still learning!).  So here’s a little that I have learned over the past couple years.

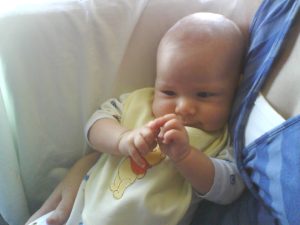
First off is babyhood.  This age group is by far the easiest to fly with (at least in my experience so far).  You don’t need anything to entertain them.  They entertain themselves (just see how J is fully engrossed in his fists!).  They will most likely sleep for the majority of the trip which is just beautiful.  Enjoy it!  They grow out of this stage and you will soon be working the whole flight! 
What to Bring (this is not an all-inclusive list; I’m trying to remember back a few years ago!):

  • Extra clothes for baby and for parent – It’s amazing how a child with no prior blow-outs can suddenly surprise you in mid-air.  I always dressed J in the footed pjs so I wasn’t worried about him losing socks.  It was just easy for us.  If you choose to dress your little one in shoes, security does require you to remove their shoes too.  Save a step and leave the shoes in the luggage. 
  • Antibacterial wipes – I wipe down EVERYTHING when we first sit down; who knows who sat there before you and the cleaning crew does NOT clean windows, trays and arm rests thoroughly
  • Diapers and wipes – of course, right?  Pack even more than you would normally need for the duration of travel.  Layovers happen. Blowouts happen.
  • Carrier -this is the easiest way to travel through airports. Most security lines do NOT require you to remove your baby from a wrap/carrier.  **Of course, if they ask you to remove them, don’t ask questions.  It will do no good.  Just comply and move on through.**  Definitely keep them attached to you unless directed otherwise.  This provides one less step while going through security.  I have traveled alone with my infant J in a stroller.  You are left trying to close the stroller, hold your baby (who of course just fell asleep so now you’re waking him up with all the joggling), get that stroller up on the security belt while of course dealing with your other belongings too.  Even if you need a stroller for your trip, I would still recommend wearing baby through the airport.  It’s just easier.
  • Changing mat or burp cloth – I had a small bag that fit inside my larger diaper bag with a changing mat that carried a few diapers, wipes, and a change of clothes.  I liked having this so I didn’t have to carry the big diaper bag down the aisles to that tiny restroom. **Oh and some planes do not have a changing table in the restroom(albiet the smaller ones; honestly we’ve only been on one in all our travels) .  One more reason it’s nice to have that changing mat/cloth just in case. A burp cloth works well since you could potentially use it for other things if needed.
  • Feeding supplies – I nursed J even on the plane, at first using a nursing cover but later I found a zip-up sweater worked even better.  It was one less thing I needed to bring on the plane and honestly I always felt conspicuous with that huge nursing cover whereas I could easily tuck J’s head behind one side of the sweater to nurse and no one even knew.  Nursing works great on a plane.  If you bottle feed, I personally suggest the Drop-Ins for travel.  You only have to bring one actual bottle and then just toss the insert when finished and refill a new insert when needed.  Less bulk to pack, no worries about cleaning out the bottle before the next feeding.  I have used these before during travel and they worked well.  For long flights I dried some dishsoap on a sponge, cut them up into small squares and then used one to clean out the nipple (or later sippy cup) for later use. 
  • Bib– J rarely needed bibs on a normal basis, but I always had one on him during flights.  It saved us from having to change clothes if he were to suddenly spit up or drool excessively. 
  • Small Pillow – this may seem excessive, but it was worth it for me.  I happened to own a small sponge contour pillow that worked perfectly.  It wasn’t bulky, it curved up around the edges to keep J centered.  I could simply lay the pillow on my lap and then J on the pillow which kept us both cooler and more comfortable.  It also worked well as a temporary nursing pillow. 

General Tips:

Stay relaxed and remember this too shall pass. Yes, you will of course hit turbulence RIGHT when you’re in the bathroom, beginning to peel that blow out diaper off your infant.  Yes the pilot will come over the announcement to warn everyone to get back in their seats at that moment.  Just stay relaxed, try and see the humor in the situation.   Yes, your baby might decide to scream through security, even if they’ve never shed a tear prior.  Just keep calm. This too shall pass.  Yes, your infant will fill their diaper to overflowing RIGHT when the plane leaves the gate and you aren’t allowed up to change them while waiting in that 30 minute line for takeoff.  Just stay calm.  This too shall pass. Getting annoyed or stressed does nothing to help you or your little one.  I fully believe our little ones excel in reading body language.  They will read into your stress and become more easily agitated themselves.  That will do no one any good.

Keep a sense of humor about the trip.  I know I mentioned this before, but it’s worth repeating.

 Show your little one off to the other passengers when you are waiting to leave the gate (don’t force your baby on them, but let them admire them all they want).  Be friendly with them.  Tell them how old your little one is, even be honest about your nerves but also mention you will do your best to keep your guy calm and content throughout the flight. This serves multiple purposes.  It helps you remain calm.  It helps them remember you are a fellow human, not just some mother who dared bring their child on a plane just to annoy them!  It helps them hold their patience a little longer if that adorable baby decides to cry for awhile…. or stinks up the plane momentarily.

Don’t worry about routines.  On a normal basis, I am a proponent of schedules and routines for J.  On planes, I am just fine with getting off the routine.  If J wanted to sleep longer while flying, fine.  If he wanted to eat more often, no problem.  My goal was keep him content, which has great side benefits:  mom/dad is kept content and of course the other passengers on the plane remain content too. 

Feed baby just before entering airport.  This honestly always worked best for us when J was an infant and young baby.  J would often get a catnap on the way to the airport and I would feed him in the car upon arrival.  This meant he was well-rested and well-fed BEFORE either of us had to deal with the craziness inside.  You don’t want a hungry baby in the security line or while heading onto the plane.  They will also likely be at least hungry enough to feed a little (though not necessary, see next tip for more) upon departure if you want them to suck on something during take-off.

Don’t worry about ear pressure.  That’s seems to be a very common question I get about flying with little ones.  J has never had an issue with his ears while flying.  In talking with other moms, they’ve told me the same thing.  To be safe, I would be sure there is no ear infection prior to your trip and then don’t worry about it.  **I should note that there was one instance where J’s pediatrician found an ear infection in one ear eventhough J had NO symptoms at all.  I had just taken him to the doctor pre-travel as a precaution.  I’m so glad we did.  I wouldn’t want to get on the plane only to realize then that his ears were a problem. **

It’s true that drinking or sucking on something helps to relieve pressure in the ear, so be prepared just in case. But if your little one is sleeping, my suggestion is let them sleep.  Don’t worry about their ears. I see parents on planes waking their sleeping baby up for takeoff/landing to feed them fearful that their little one will be in pain.  Usually they end up with a fussy baby that didn’t want to wake up and doesn’t want to eat.  With the pressurization on planes today, cabin pressure is not a big problem at all.  If you notice anything it would most likely be during the initial descent (about 30 minutes prior to landing), but even then a problem is unlikely.  They are way better with this today than 20 or 30 years ago when we were flying as kids.  Again, J has never had a problem.

Most importantly, flying gets you to where you need to be… and does so quickly (comparitively speaking).  You will make it and your little one will make it.  I would not let fear of travelling with an infant keep me from flying.   Go and have fun!

And you might just make it with ease. Actually while flying with an infant, this is entirely likely!

I’ll be posting my thoughts, experiences and helpful activities for flying with older babies, pretoddlers and toddlers soon.

Snowflake Bentley, Story and Activities

Snowflake Bentley, by Jacqueline Briggs Martin is a book I happened upon at the library.  It’s a non-fiction book actually, but told in story-book fashion about a boy named Willie Bentley who was fascinated with snowflakes.  As a child he would catch the snowflakes and attempt to draw them on paper before they melted.  Eventually his parents bought him a microscope camera to photograph the snowflakes.  Can you imagine trying to photograph a snowflake using an 1882 camera!?!  I’m sure we’d all have trouble with our modern DSLRs! Amazingly, he stuck to his goal.  He held slideshows for townspeople to come see his photographs which were eventually published in a book called Snow Crystals that is used by colleges and universities. His fascination led to the discovery that all snowflakes are unique. 

Throughout the book there are sidebars with extra facts about snow, William Bentley and his work.  I’m so glad I came across this book.   We used it to kick-start a discussion about snowflakes, photography, persistence, dedication and a job well-done.

Here’s a couple activities we did to go along with the book:

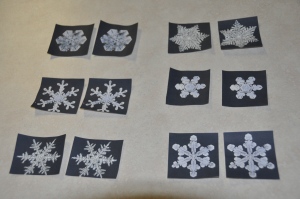
1. Snowflake matching –  I googled Snowflake Bentley photographs and printed out two copies of the same photos.  At first I presented 3-4 to match at a time since you have to really examine some to find the differences.  As he got better, he could match more at a time. 

2. Snowflake puzzle – I cut some of Bentley’s photos in half, mixed them all up and J found the two symmetrical sides to join together and create a snowflake.  This was a great way to emphasize the meaning of symmetrical.  These 2 activities really met J’s current ability level since I could easily make the level of difficulty was just right for him by picking and choosing the snowflakes to match.

Age attempted: 33 months; you could go into so much more detail for older kids and increase the difficulty of the activities by using snowflakes that are more similar in comparison

Build a Snowman Sequencing Activity

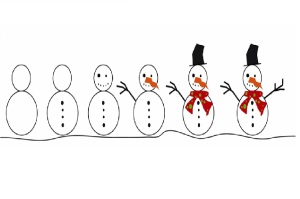
This is one of the winter-themed activities J did.  I found a picture on Google Images and cut the pieces apart for J to put in order.  This is simple prep work but great practice in sequencing. 

Here are the images I used (including two different sets of snowmen). Build A Snowman Sequencing Activity

Age attempted: 32 months

If you DON’T like traditional shape cookies, try these!

I never posted about our Christmas cookie baking, but we sure did A LOT of it.  I think baking is one of those activities where they can learn a lot (if we slow down enough to let them) and where they see a great reward for their efforts. 

Of course it’s easier, cleaner and faster to mix up the cookie dough on your own, but I’ve found that the majority of learning comes from allowing J to help mix the dough.  He “reads” the recipe, gathers the ingredients and then measures them, allowing him to practice tons of skills. 

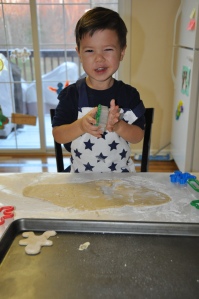
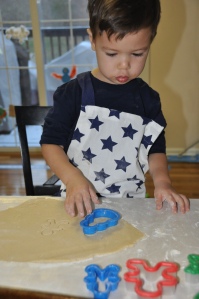
We of course made the traditional sugar cookies where we rolled the dough out, J cut them into fun shapes and then decorated to his hearts content.  This is NOT my favorite type of baking!  J loved it, but it’s honestly quite stressful to me.  I try to stay calm, but I’d just rather not deal with the rolling and the cutting.  I think J would have as much fun with playdough and mom wouldn’t have the mess afterwards. (And I don’t even like the taste of this these cookies either!)

We honestly might stick to playdough in the future. BUT all cookie baking is not lost.  We did have lots of fun baking other types of cookies (or I should say we BOTH had fun with other cookies).

My favorite type of cookies to make with J this year were those with a “surprise” inside.  Once I realized how perfect these were for J’s age and ability level, this is mostly what we made to give away to neighbors and teachers. 

I scooped the dough onto the baking sheet and J pressed each ball with the back of a teaspoon, creating a small hole.  He could then “bury” a surprise inside each cookie and I helped him cover it up with the dough.  This was right at his ability level and he loved it.  We buried Rolos, Reeces Pieces, Reeces PB Cups, Chocolate Kisses, and M&Ms (not all in the same cookie!).  I also let him sprinkle crushed toffee and confectionary sugar on top of some which he liked. 

And the good news is they taste great afterwards.  You can hide them in basically any type of cookie dough and it will taste good. 

Age attempted: J first helped with Christmas baking when he was 20 months; this year at 32 months he could do A LOT more

So here are some of the recipes we tried for Christmas:

Million Dollar Caramel Cookies (These were by far my favorite!)

Snowball Surprises

PB Surprise Cookies (basically chocolate chip cookie dough but hide PB cup, M&Ms, Rolos, whatever candy you want inside)

Molten Lava Cookies

**I hope these are the same recipes I used; I just did a online search for the names of each, but the pictures looked very similar in all cases… that should count for something right!**

Butterfly Card

J made two butterfly birthday cards, one for his grandmother and one for his cousin who both love butterflies.  I remembered an adorable card a college roommate made me way back when and decided we would try a toddler version of the same. 

I also found these instructions from Enchanted Learning and modeled ours close to that.  Basically I cut out two butterfly shapes and then trimmed one about an inch smaller than the other (saving the trimming for our 2nd butterfly).  The other supplies we used were googly eyes, glue, a stamp pad, hole puch, and pipe cleaners.

 J could do most of the rest really.  Though this was J’s first attempt with a hole punch and it was honestly too difficult.  Eventually he just pushed the puncher down over the paper and thought he was helping as I gripped the handles and did the work.  He found the hole puncher very intriguing!

His favorite part was the fingerprints.  I should’ve known red ink last a LONG time on fingers.  It’s supposed to be washable… and I guess it technically was, but it tooks LOTS of washing. 

I forgot to show the final result when we had the birthday message written on the cards too.  I thought they turned out cute.  They would work as Valentines, Mother’s Day, or birthday cards or even as decor for springtime.  I think it would be pretty to create a few different designs and hang them all together on a mobile.

Age attempted: 33 months

Thanks for the guest post!

I can’t believe I am so late in writing this.  It must’ve been due to the holidays, surely it’s not because I’m disorganized and forgetful, right????

Val over at Chronicles of a Babywise Mom let me write a guest post (back before Christmas, so yes, I’m way late in posting this)!  I was so grateful for the opportunity and thrilled that she considered what I had to say blog-worthy.  My post is called Value Learning and talks about WHY learning activities are important and HOW to get started. Check it out!

I found her blog a couple of years ago and have found it to be a great resource.  It is extensive to say the least, so use the index to navigate to your topic of choice. And you will surely find a topic of interest, whether discussing infants or preschoolers. 

Here are some of my favorites on the topic of teaching our kids:

Teaching Children Who’s Job is It?

Learning Activity of the Day

Chore Cards

Family Planning (setting lifetime goals for your children)

Balancing Time with Children (planning your days for their development)

Teaching Christ All Year

Factors That Influence Learning

Thanks Val for the opportunity!

Color Mixing with Ice

When I was pulling up the old activities using ice, I realized that I never posted this last summer (I took a LONG break back then!).  These photos are from this past summer.   This is a great outdoor activity but a few simple adaptations can  easily bring this activity inside during the winter months and actually works well with a winter theme. 

(I honestly just copied this post from the one I wrote for our private family blog last summer.  I made very few adjustments – in italics – which is why it sounds like I’m writing from the perspective of summer…. I was!)

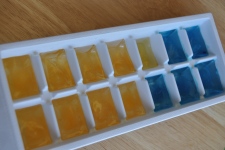
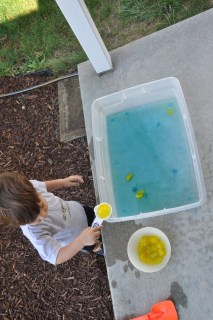
J’s homemade water “table” is still one of his favorite activities of the summer.  A few days ago we made yellow and blue ice cubes together.  This is an activity all in itself and a great way to teach the process of freezing. Let them fill the tray using a scooper or a medicine dropper to include some fine motor skill practice!  He’s been patiently waiting to play with them since. 

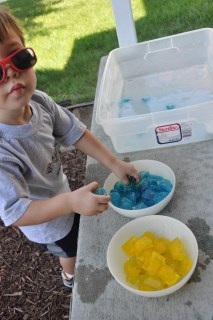
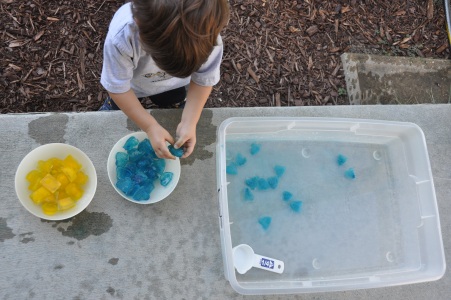
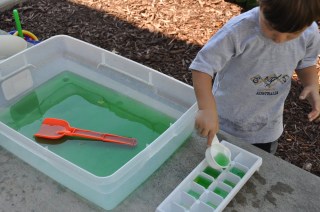
He first separated the ice cubes into bowls by color and chose to make blue water first.  I filled the tray with a small amount of water (just make sure the tray is white/clear so you can easily see the water change colors as the ice melts). He really enjoys scooping and stirring the ice cubes, letting them melt in his hands,… **Use this step to utilize motor skill practice with tongs or different size (and length) scoopers or spoons.**  I’m surprised at how long a little ice can entertain!  When he moved onto the yellow ice cubes I asked him which color the water (currently blue) would become and he of course guessed yellow.  I told him it was going to be a surprise that he’d have to wait and see.  He wasn’t convinced the water was actually green until the very end when there was no denying it.  He was sure it should be either blue or yellow! 

(Sorry, I kinda cut off his face!)


We then filled the ice cube trays with green water to play with in the future.  This activity is free, entertains a good while and recycles itself too!

Favorite Ice Posts

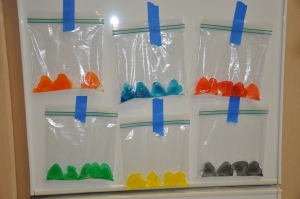
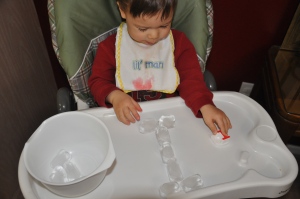
These ice activities from last year would work well during winter. I have a few of them on the list to do again this year.  Click on the picture to see more about the activity.

Melting Hearts

Ice Painting

Ice Melting Bags

Ice Blocks