Category Archives: Christmas

Homemade Gift: Magnetic Foam Frames

J made these to give to some of our family as a Christmas gift.  This was a homemade gift he could feel completely responsible for and KNOW that he created it himself. 

Materials: Foam, Magnetic plastic frame (from dollar store), Stickers, Buttons, Googly Eyes, Post-It Notes, Glue

Prep: I cut out the foam frames and gathered materials for J to choose from to create his gifts. **You can also buy prepackaged foam frame crafts and just add the fridge photo magnet on the back yourself.**

We had 4 frames to complete as gifts, so J chose the color for each recipient and the materials to decorate it with.  This also meant that one set of materials weren’t used (he didn’t choose the googly eyes this time).  I helped make sure he was spelling his name correctly on frames (all except one, which he declared was for Grandpa and would hold a picture of Grandma since he loved her so much… hence no need for J’s name on the frame!).  The only other involvement I had in the process was some encouragement to practice creating a pattern with the buttons.  He’s all about patterns right now though so not much need to push with that!

He also didn’t complete all the frames at one time.  After he finished a couple and chose the materials for the others, I packed some up for him to complete on the plane.  This was a great activity to do on a plane, little packing, light-weight and kept him focused.

I was so surprised to see how symmetrical he designed the frame with bubble stickers, maybe he’s finally getting out of that stage where he wants to stack stickers on top of each other! 

After everything had dried, I glued a magnetic frame (bought at a dollar store) onto the back so the frames could be placed on a fridge and photos could be traded out easily. **Be sure you don’t glue the frame closed so that photos can be changed out later.**

Age attempted: 33 months

If you DON’T like traditional shape cookies, try these!

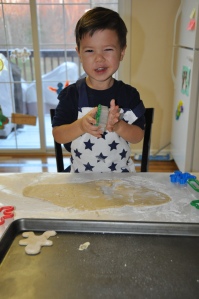
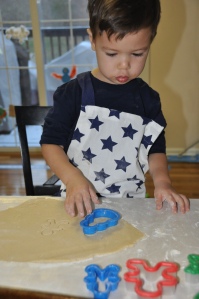
I never posted about our Christmas cookie baking, but we sure did A LOT of it.  I think baking is one of those activities where they can learn a lot (if we slow down enough to let them) and where they see a great reward for their efforts. 

Of course it’s easier, cleaner and faster to mix up the cookie dough on your own, but I’ve found that the majority of learning comes from allowing J to help mix the dough.  He “reads” the recipe, gathers the ingredients and then measures them, allowing him to practice tons of skills. 

We of course made the traditional sugar cookies where we rolled the dough out, J cut them into fun shapes and then decorated to his hearts content.  This is NOT my favorite type of baking!  J loved it, but it’s honestly quite stressful to me.  I try to stay calm, but I’d just rather not deal with the rolling and the cutting.  I think J would have as much fun with playdough and mom wouldn’t have the mess afterwards. (And I don’t even like the taste of this these cookies either!)

We honestly might stick to playdough in the future. BUT all cookie baking is not lost.  We did have lots of fun baking other types of cookies (or I should say we BOTH had fun with other cookies).

My favorite type of cookies to make with J this year were those with a “surprise” inside.  Once I realized how perfect these were for J’s age and ability level, this is mostly what we made to give away to neighbors and teachers. 

I scooped the dough onto the baking sheet and J pressed each ball with the back of a teaspoon, creating a small hole.  He could then “bury” a surprise inside each cookie and I helped him cover it up with the dough.  This was right at his ability level and he loved it.  We buried Rolos, Reeces Pieces, Reeces PB Cups, Chocolate Kisses, and M&Ms (not all in the same cookie!).  I also let him sprinkle crushed toffee and confectionary sugar on top of some which he liked. 

And the good news is they taste great afterwards.  You can hide them in basically any type of cookie dough and it will taste good. 

Age attempted: J first helped with Christmas baking when he was 20 months; this year at 32 months he could do A LOT more

So here are some of the recipes we tried for Christmas:

Million Dollar Caramel Cookies (These were by far my favorite!)

Snowball Surprises

PB Surprise Cookies (basically chocolate chip cookie dough but hide PB cup, M&Ms, Rolos, whatever candy you want inside)

Molten Lava Cookies

**I hope these are the same recipes I used; I just did a online search for the names of each, but the pictures looked very similar in all cases… that should count for something right!**

Christmas Index 2010

**Before I remove the Christmas Index Page, I wanted to store it in a post for safe keeping next year. Check out the new Winter Index Page that shows some of the activities I will be choosing from over the next couple months.**
How I Use an Index:
I’ve learned that if I don’t organize my online finds, I forget about them.  I created the indexes to keep that from happening.  I create the ongoing list of  potential activities that I then pull from when planning.  Sometimes I have activities planned out way in advance.  And then there are the weeks I get behind.  The index works great to pull ideas from quickly.  We DO NOT accomplish each activity on the list, that is not even my goal.  I can always use the same index to pull from next year, hopefully lessening my prep work in the future too.   For now I am only posting my seasonal indexes. 
I hope you find these lists helpful too!  
 
Christmas Index 2010

My Little Chef: No Bake Holly Cookies

J and his grandma made these cute no-bake Holly Cookies for Christmas.  They turned out really cute and created minimal mess (my favorite, especially during the busyness of Christmas). 

INGREDIENTS

  • 30 Large Marshmallows
  • 1 tsp vanilla
  • 1/2 stick of butter
  • 4-4.5 cup cornflakes
  • 2.5 tsp green food coloring
  • 1 package of Red Hots
  • 

WHAT YOU DO:  

  1. Melt marshmallows, vanilla and butter in bowl together in the microwave (or in double broiler).
  2. Stir in food coloring and then add cornflakes, covering all with the green marshmallow mixture.
  3. Scoop individual servings on wax paper. 
  4. Add 3 red hots to each scoop.
  5. Let them set before serving.

Reindeer Sandwich

This is a fun addition to lunchtime.  It’s so easy and your toddler will enjoy it.  Simply add two antlers (pretzles), two eyes (raisins or chocolate chips) and a red nose (red M&M) to a sandwich.  Of course as soon as J saw his sandwich he requested mom to sing Rudolph the Red Nose Reindeer again and again and again… so be prepared!

Homemade Toy: Audio Books

When I was little my grandmother used to record stories on tape for us.  We still have some of them!  She also sent some to my cousins who were overseas at the time.  I think this is an awesome gift for little ones that live far away.  They get to hear your voice on a consistent basis, acting out your love from thousands of miles away by reading stories to them!

A few years ago I took the same concept and made a set of books on CD for my nephews (age 2 and 3 at the time).  I chose some favorite books from childhood and recorded myself (and my husband) reading them using my computer. 

I used a free recording software called Audacity.  It worked well.  Their software was easy to use and easy to edit.  I later went in and added a little chime sound for when the page should be turned.  The software made it easy to dub the chime to my saved recording.  Just Google “free sound effects” to find a wide array of choices.  Finally I burned all the stories onto a cd, made a cute little cover for it and packaged cd and books together for my nephews. 

We also recorded some fun family stories and songs and I added a few stories from my grandma and grandpa (using the tapes they gave us as kids).  

I should add that I am not a technological expert by any means.  I have trouble with Facebook! 🙂  I guarantee that if I could do this, anyone could. 

It really wasn’t a difficult project to complete and I think it’s a great gift.  I recently burned all those same stories onto a cd for J so it’s become a gift that keeps on giving!  It’s been great to use on road trips and plane trips.  It also works great while cooking dinner.

If you’re still deciding on a Christmas gift for a little one in your family, you should try this out! 

Age attempted: 2 and 3 (for nephews and for J)

Homemade Gift: Door Draft Stopper

I think our Slithering Snake door draft stopper turned out pretty cute.  J and I made these together for his greatgrandparents. You can use them by doors or windows, or just as a cute decoration in a nursery.

When I first saw this idea, here at Family Fun, I stopped reading as soon as I saw “stitch it closed.”  If an activity/craft involves sewing, I typically declare it NOT FOR ME.    

After going back and forth for weeks, I decided we’d try it.  We pretty much followed the instructions on the original site exactly. 

What you need:  Cute tights, filler (we used a full 5 lb bag of rice), 2 googly eyes, red felt, fabric glue, needle and thread. 

I made a homemade funnel (water bottle) for J to use in filling the “snake” with rice.  I then forced myself to break out the dust-ridden sewing box and finish it off.  It wasn’t as hard as I had expected and took me about 10-15 minutes to sew it closed.  Most of you would probably find the sewing pretty simple (and a 5 minutes job).  I found it manageable.  Trust me, if I can do this, ANYONE can!

J then glued on the googly eyes and the tongue using fabric glue (I later sewed down the tongue for extra durability). 

The photo is actually of the one we made to use ourselves.  I wanted to give it a test-run to be sure it didn’t break easily before making more for my grandparents.  I certainly didn’t want my grandmother’s to end up vaccuming  rice all year long if they were to break.  I’ve found it actually holds up really well, so no worries there.   We use ours actually to block out the light that streams under the door in J’s room.  We have skylights right outside his door.  I found the sleeps sooooo much longer in the mornings if I block that light.  His room is also open to the rest of the house it can get noisy.   Who knows, maybe this will also help block some of the noise!

I think these are cute choices for homemade gifts, something that takes anywhere from 10-30 minutes to complete!

Age Attempted: 32 months

Teaching the Joy of Giving

The joy of receiving comes pretty naturally to all of us doesn’t it!  In light of that, we’ve focused our attention on teaching J the joy of giving.  In fact J really hadn’t figured out that he would receive gifts on Christmas too… until this weekend 🙂  We made shoeboxes for Operation Christmas Child, homemade cookies for teachers and neighbors, he wanted to bring stickers to his friends to the Christmas celebration at Bible Study last week, …  I’ve been so proud that he is starting to think of ways to give on his own too! 

Honestly,  I’m learning how to teach this as I go.  But I’m finding it really it isn’t as difficult as I had anticipated.   We focus on the smiles on faces or the laughs we hear when we give, the way it makes someone else feel.  We try to vocalize how we feel when we’re given something to add more opportunities for J to make the connection behind the purpose of giving.   J is starting to notice.  He came home from Bible study so excited because the other kids in his class were “so happy!” when he gave them stickers. 

So this year I decided J was old enough to go shopping himself.  I started with dad first, asking J what gift he wanted to give daddy for Christmas.  His first response was cars and trains.  Of course! Those are J’s personal favorites so why wouldn’t dad enjoy those too?

So we had a lesson on how to give gifts. Think about what the person enjoys doing.  What do we see daddy excited about?  This wasn’t easy for my 2 year old to grasp.  But he eventually got it!  I was so proud when he finally started listing things that Daddy liked and decided on the perfect gift.  An orange!  He was so thrilled with the idea.  And it’s true, my husband loves oranges.  So we took off to the store to buy an orange.  

J wrapped up the orange and he placed it under the tree.  J has been THRILLED with his choice and COULDN’T WAIT to give it to daddy.  In fact when dad came home from work the night of our shopping trip, J ran up to him with a “Happy Birthday!!”  I got you orange!!!”  Obviously he’s still a bit confused.  It’s a work in progress.   He wanted dad to open the gift right away, but slowly caught on when I convinced him to keep it a secret until Christmas.  Each day since, he has retrieved the gift for dad from under the tree and carried it around, telling me all about what’s inside.  He gives it a place of honor, separate from the other gifts.  It’s so cute to watch. 

I love that his focus is not on the gifts for him that wait under the tree, but what he gets to give. 

Today was actually our family’s day to exchange gifts.  Schedules just made this most feasible instead of waiting Christmas morning (which is fine by me actually since now we can focus even more on Jesus’ birthday).  J ran straight to get dad’s gift.  His excitement was still there and was thrilled to see dad open (and eat) his present.  Can you tell? 

Tonight during our bedtime prayer, long after all gifts were opened, J of course was thankful for the gifts he received.  But, I love that he wasn’t focused on just that.  He also remembered in prayer, getting to give dad a gift too and how happy dad was to get  his orange.  I think teaching the joy of giving is a process that takes time and lots of practice.  I definitely think it’s worth the effort to start working even when our kids are young.  

There’s still plenty of time!  Ask your little one what they would like to give their mom, dad, or grandparents for Christmas.  I would suggest having this conversation before hitting the store.  Encourage them to think from another’s perspective.  It doesn’t have to cost much, the price of an orange can go a long way in teaching a very important lesson.

Now on to see what J wants to give the rest of the family!

A Soft Manger for Jesus

I saw my friend Kelle doing this with her kids years ago, before J was ever born.  I logged the idea away in my head for the future and was excited this year to include it in our own family’s Christmas traditions.

What you need:  A manger (the actual manger was most likely a stone troft, but we’re just using a basket); a baby doll to represent Jesus, and something to represent hay (rafia, shredded paper, cotton balls,…) 

The goal is to create a soft manger by the time baby Jesus is born.  They do this by adding hay to the manger each time they do a good deed.  I’ve incorporated this activity with our memory verse, Matthew 5:16, “Let your light shine before others, that they may see your good deeds and glorify your Father in heaven.”  J gets to add hay into the manger whenever he shines his light.  It took a few days for the concept to grab hold, but it has.  J now takes note whenever he sees others shine their light too.  This makes for the perfect opportunity to put in practice the second half of the verse and praise God for that person’s light. 

In most cases, I’ve seen baby Jesus held from the manger until Christmas morning.  This year, I actually have our baby lying in the manger daily.  It just helps my 2 year old grasp the purpose of the manger that much more.  It’s also kinda nice to see our baby Jesus included under the tree, next to all our wrapped packages.  I like that it’s a simple visual that keeps the purpose of Christmas in the forefront of minds.  

Age attempted: 32 months

Teaching our kids Jesus is the Light of the World

I’ve been focusing a lot this season on teaching J that Christmas is Jesus’ birthday and why a little baby born long ago is so important. 

Our first memory verse on this topic is John 8:12, “Jesus said, ‘I am the light of the world.  Whoever follows me will never walk in darkness, but will have the light of life.”

We did an activity that helped to reinforce the scripture. 

Activity: After nap one day, I took a flashlight up to J’s room.  His room is pretty much pitch black without lights on, especially if the sun is down.  We talked about the purpose of a flashlight.  He loves flashlights, so he was thrilled to teach me all that he knew!  I pointed out that when the room was dark we couldn’t see anything.  I couldn’t find J and he couldn’t find mommy.  We could get lost easily in the darkness.  But the light helps us see (he turned the flashlight on).  The light helps us know where we’re going.  It helps us find the things we need.  It helps us know whether it’s safe to go a certain direction. 

Then I called out things for him to find in the dark.  Of course in the pitch black he couldn’t find them (and didn’t want to venture out to find them).  When he had the light, he could find them easily.  He had lots of fun pointing the flashlight to hit the exact thing I called out (unexpected practice in motor skills since they have to hold the flashlight steady and have good hand-eye coordination).  We also played some hide and seek in the dark, I hid while the flashlight was off and he used it to find me.  He just laughed and laughed everytime he found me and could shine that light on my face.

I emphasized how the light helped him and how he couldn’t do it on his own.  Then I brought out John 8:12.  We talked about how Jesus came into the world as a baby so that He could save us.  He is our light.  When we’re having trouble, lonely, scared or when we did something wrong, Jesus iss the light to help us.  If we don’t have Jesus, it’s hard to live the way we’re supposed to.  Just like trying to find the teddy bear in the dark on our own, it’s too hard.  But with the light, we could do it.   With the light he could find mommy and we laughed everytime the light hit mommy.  With the light we could laugh and have joy.  In the darkness we didn’t laugh, we were just lost and confused.  Because Jesus is our light, we can laugh and have joy inside all the time. 

I’m completley paraphrasing here.  I don’t remember everything I said, but you get the gist.  I didn’t preach a long sermon to my 2 year old because he wouldn’t have focused so long on one deep topic.  I certainly didn’t say everything I typed here in one long message.  We went back and forth between playing and me emphasizing the lesson.  If I saw questioning eyes, I would break it down in a simpler way.  If he had a question, I would stop and answer it. If he made a remark during the game that could be applied to the overall lesson, I commented on it quickly and we kept playing our game.   I saw this lesson as a stepping stone for many discussions in the future. I don’t have to teach him everything at once.  In fact, J has already brought up the topic on his own since this initial lesson.  I see it as slowly building a foundation that he can later stand on himself. 

We have since been working on the  memory verse.  Feel free to use the printable for John 8:12 (in pdf) that I made to help J visualize the scripture.  As always we have it hanging near the dinner table. 

There’s so many opportunities to remind J of this verse.  When we’re driving around and see lights on houses, repeat the verse.  When turning our tree lights on in the morning, repeat the verse.  When the light on his Little People Nativity set turns on, when he places the stars on our Advent calendar,…  We’ll do it when we light the candles on our birthday cake for Jesus. 

All of this also goes hand in hand with the Bible readings we’re doing through Advent (we’re pretty much following this list, using the Jesus Storybook Bible).  I love this children’s Bible, by the way.  I’ll probably have to do a post on it just to share all the reasons why it is so awesome!  And it leads you perfectly into teaching how Jesus is the Light of the World.

Age attempted:  31 months