Monthly Archives: February 2010

My Little Chef: Bean & Cheese Chips

J often helps me in the kitchen.  Cooking is one skill that I want all of my children to have.  The don’t have to be culinary experts (they certainly won’t get that training from me!), but know enough to prepare tasty, healthy meals for them or their future families.  Cooking offers a ton of teachable moments.  Science, math, reading, motor skills, … those are the first things that come to mind.

This “recipe” is perfect for a toddler.  J is fully involved and feels fully responsible for the end result.  It’s also a great way to sneak some protein into an afternoon snack.  I tend to offer this snack when he’s hasn’t been too impressed with the proteins offered during the previous meals.  I have also used this as a quick lunch, but since it does include tortilla chips, I try to keep it a snack.  I grew up with this as a child friendly appetizer on Enchilada night. 

The recipe (if you can call it that) is …

INGREDIENTS

  • Bite size tortilla chips
  • Sliced Cheddar Cheese (or any cheese you have!)
  • Refried beans

DIRECTIONS:   Lay out chips on baking sheet.  Place a spoonful of beans on each chip and top with cheese.  Broil until cheese is melted. 

I use this recipe to help J practice understanding and following instructions.  I lay out the baking sheet and a plate of chips.  I tell him to lay out X amount of chips on the baking dish.  This is great counting practice for him.  When he’s a little older, I can ask him to lay them out in a particular shape or even a simple line as extra practice in motor skills.  As he lays each chip out, I cover it with the refried beans (he’s not quite ready for this step).  I then tell him to cover each chip with the cheese slices.  We play a little “I Spy” here to help him complete the task.  (“I spy 2 chips that need cheese!!  Can you find them? Where are they? Yeah, you found one!”)  Then we place them in the oven, discuss how the oven is hot and just like heat melts snow, it can melt cheese too! 

It doesn’t take long for them to “cook”  and cool enough to eat, so he gets a quick reward for his efforts.  Out of all the dishes he helps cook, this is the one he most understands he had a hand in its creation. 

Age Attempted: 22 months, could be done earlier

Try Again?  This will be used many more times I’m sure.

Snow Cream

Winter continues.  I think all parents get a little tired of being stuck inside right around this time of year.   The good thing is I’m getting to try out lots of activities with J.  With the unusual winter we’re having, many of those activities involve snow.  I brought out the snowbox again today and J played for a full hour.  

This afternoon we tried snowcream for the first time.  Yes I had never tasted it either, being a true southerner.   Honestly, I had never heard about it until this year!!  So I googled it to find a recipe and J and I mixed up a batch together.  J helps me cook or bake each Friday; this was by far the easiest thing we’ve made together.  He helped me pour the sugar, vanilla, and milk into the snow.  Using specific directions like “fill the cup with sugar” or “empty the cup” is always good reinforcement.  Of course he also helped stir until it looked just right!   He loved it…. eating it that is.  I mean really loved it.  I think he would’ve eaten the entire half gallon had I not stopped him. 

Here’s the recipe:

INGREDIENTS

  • 1 gallon snow
  • 1 cup sugar
  • 1 Tbsp vanilla extract
  • 2 cups milk

You'll need these ingredients.... plus snow!

DIRECTIONS:  Collect snow as it falls inside a bowl.  Add sugar and vanilla to taste and then add milk until you see the right consistency.

The recipe is from allrecipes.com http://allrecipes.com/Recipe/Snow-Ice-Cream-II/Detail.aspx

**I made only about half a gallon and think I added too much sugar (half a cup). It was VERY sweet!  I’m sure that’s one reason why J loved it so much!  Next time I will start with less sugar and work up. 

22 months

Age Attempted: 22 months

Try Again?  I’m sure this will become a special snack each time it snows!  As he gets older he can measure out the ingredients and eventually read the recipe too.

Empty Dishwasher (and learn while he’s at it!)

I always have J help me with the household chores.  I want to encourage him that we ALL take care of the things given to us; it’s a team effort.  So he helps with anything he is capable at that particular age.  Yeah, things may take a little longer and might not be done exactly right, but it’s definitely worth it. 

Putting away the clean dishes is one way he helps.  He currently helps sort the utencils back in the drawer, forks with forks, spoons with spoons (I remove the knives of course).  Then I place his sippy cups within his reach and he matches the correct size and color lid to each one so I can put them in the cabinet.  At first he didn’t always match them correctly but not he’s a pro.  It’s great practice especially since we have many different types of cups, all different colors and sizes.  He really loves this and is disappointed if he notices I do it without his help.  

22 months

 Age attempted:  We started this sometime around 16 months; he still does this now at 22 months

Try Again?  Yes; as he gets older I set out more cups and lids at a time to increase the difficulty

Sticky Body Parts

This activity came about on the fly while removing the Tape Shapes from the kitchen floor.  We had enjoyed them for a week, but the novelty had worn off  so they needed a break.  As we were removing the painters tape, I inadvertently stuck some on J’s shoulder and of course he pulled it off.  I decided this could become a great way to reinforce body parts. 

I covered him with little pieces of tape, all placed on specific body parts, many that he could not see.  As he started removing the easy ones, I would tell him “I see some tape on your elbow!” or “I see some tape on your calf!”  It worked really well.  It was a great refresher activity. 

I also took a turn by placing the tape all over me and asking him to help me get it off by telling me where the tape was.  He enjoyed trying to instruct mommy, “Nose! Nose!” or “Back, Back!”.  All the while, I’m playing clueless so he could help “teach” me. 

This same activity could be done with stickers.

Age attempted?  22 months, could be done much earlier, even when you first start teaching body parts

Try Again?  yes, it requires no set up; this could also be a great plane activity

Tape Shapes

J got a great gift from his Aunt… colorful bean bags!!  I’m so excited to use them for lots of fun!  This is my first official activity using them.  I used painters tape to create various shapes on thekitchen floor, in this case a square, triangle and rectangle.  We’re currently emphasizing the rectangle in our house since it’s one of the basic shapes that J hasn’t consistently recognized yet.  I chose the triangle and the square because he’s better as those (adding just one unfamiliar shape at a time).

I then gave J specific directions, “Toss the green beanbag into the square!”  He enjoyed trying to toss them inside the shapes.  I requested a specific color bean bag to reinforce colors.  He’s pretty good at most of his colors which kept this activity focused more on the shapes.  You could definitely use the painted shapes without the bean bags… “Crawl to the circle! Walk to the square!  Walk backwards to the triangle!”

This was also a great way to emphasize inside and outside as well as fill and empty (“Empty the triangle!”)

As a side note – I left these shapes on the floor for a full week.  They’re very convenient!  If you need your toddler contained for a bit, “J, sit on the square!  Eat your snack in the rectangle!”  It gives them obvious boundaries and helps them easily understand what you’re asking of them. 

22 months

Age Attempted?  22 months

Try Again?  Yes, maybe different activities using the floor shapes.

Melting Hearts

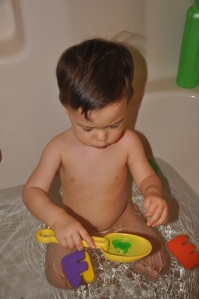
This activity was simple yet J had so much fun with it.  I froze some heart shaped ice cubes (made with green colored water the previous night.  I let him play with the melting ice cubes during bathtime on Valentines day.  The food coloring helps you keep track of the ice cubes a little easier, but it isn’t necessary.  It also colors the bath water as the ice cubes melt which was fun for J. 

I gave him a little shovel and he loved dipping the cube in and out of the bath, catching it as it swam around the water, watching it get smaller and smaller,…  They melt REALLY fast in the warm bath water so I also put a couple inside a clear cup for him to play with.  After our first attempt, I learned to give him just one icecube at a time.  This prolongs the activity and he can focus on the one ice cube. 

This ended up encourging a good science discussion to.  We discussed how different the cold ice felt compared to the warm bath water.  We talked about why the ice melted (got smaller) in the heat.  Fortunately we’ve also had a lot of melting snow around our house, so I could emphasize the fact that heat melts ice and snow throughout the subsequent week.  He now knows what melting means. 

22 months

Age attempted?  22 months; could be done younger and more in depth science discussed at an older age… or you could teach colors by melting red ice cubes and then

Try Again?  Yes

Adapt for older toddler/child? 

  •      I would focus more on the science aspect of this activity.
  •      Use this to teach colors by melting red ice cubes and then yellow ice cubes, discuss how they mix to create orange.  This might be good reiterate an earlier lesson since you could try out all color mixing in one night.

Heart Suncatcher

J made this for a friend serving in Iraq for Valentines day and yes it involves contact paper!  I think it might be my new favorite medium.  It’s perfect for a young toddler.   It is yet another form of the No Glue Collage; I love how there are endless possibilities with one purchase!

Preparation:  I cut 1″ squares of tissue paper (in this case pinks and flowers) and placed them in a bowl; I also layed a square piece of contact paper upside down on his work bench (aka the ottoman… since there’s no mess involved I know it won’t get ruined!) and kept a second square the same size nearby; as an extra step, I cut out a heart outline on construction paper

Activity:  J first placed the heart outline on the contact paper.  I wanted the edges to seal well and knew that this would help keep tissue from overlapping towards the edge.  Then he placed the tissue squares inside the heart.  It was actually a good lesson for him to learn inside and outside the lines, to control where he placed the tissue and to fill the entire heart.  When he was content, I covered the entire thing with my second piece of contact paper and cut out the heart.  I punched a hole in the heart and J thread some yarn through the hole. 

I held it up to a window and showed him how the light shines through, mentioning translucent (though it’s quite a big word for a little boy!).  Later when dad came home, he was excited to show him how to make the heart shine!


Age?  22 months, could be done earlier

Try Again?  We do lots of No Glue Collages, so I’m sure similar versions will be repeated!

Visual Valentine

While I do believe J is the smartest little boy ever, I will admit that my one year old cannot yet read.  He’s oh so close though!  He picks up any book and proceeds to read it aloud to mommy/daddy/the nearest stuffed animal.  Ok, his “reading” consists of repeating “Bible, Bible, Bible” or “babeedoody neyno nee A-A-O-O-A”, but that’s means he’s close right!?!?!

So until he masters phonics, I decided pictures would help him understand the messages he (ok Mommy) is sending to Grandma R for Valentines day.  Of course Grandma loves to get pictures too, so she won’t mind in the least! 

Beforehand I printed the pictures and cut out a sheet of contact paper, taping it sticky side up on the table.  He first placed the pictures on the contact paper.  We then wrote the message on construction paper and I cut out the words.  He stuck them on the contact paper next to the correct picture.  Then he decorated around it with extra hearts because he loves them lots and lots!!  Afterward I covered the whole project with clear contact paper. 

This is basically a No Glue Collage which I love since we’re still practicing the art of gluing so that takes longer. 

22 months

Age? 22 months but can be done earlier/later

Try Again?  We will try more No Glue Collages, I’m sure!

Snowbox

In the midst of our 2.5 foot snowstorm last weekend, this southerner realized…. it takes a lot of time dressing a toddler for snow!  Do I dress him up first or get dressed myself?  Then once we got dressed (probably overdressed!), it was still too cold and windy outside.  J also hasn’t gotten the hang of mittens (at least not the thick waterproof ones), they really impede his ability to do anything outside and when we remove them his hands are freezing in no time.  Something clicked in my brain one day, why not bring the snow inside!  A snowbox solved all my problems!  I just bring the blow up pool inside and fill it up with snow! Add some shovels and dump trucks and J is in heaven.  He could enjoy the snow and the blessings of a heated home at the same time (and mom can too)!  He dug, dumped, built a miniature hill for his rubber ducky to sled down, built a snowman, a snow wall (that of course was crashed a couple dozen times), and of course he loved letting a snowball melt in his mouth!  This was a great idea and he continually asks for more snow in his pool.  He loves it.  It’s really easy to set up and clean up. 

22 months

22 months


21 months

Age?  21 months but could be done much earlier

Try Again?  yes yes yes

Outside Snow Spraying

Well, we got over 2 feet of snow yesterday so I planned some more snow activities to entertain J with.  After the snowstorm blew over, I bundled him up to do some painting outside.  I read about this idea online.  I brought along a spray bottle filled with water and a few drops of food coloring (just one in our case, but of course the more colors the better!).  I first showed him how spraying the water on the snow turned it orange.  It didn’t go as well as I had hoped.  He couldn’t handle the spray bottle on his own so I ended up doing all the spraying.  He watched and told me what to “paint” in the snow.  I should have taught him how to use the spray bottle inside where it was warm and he had less distractions. 

Another problem was the water kept freezing in the spray mechanism, clogging the spray bottle.  It was really cold!  It was fine as long as I was continually spraying, but if I stopped for any length of time it would freeze up and stop working. Shaking it around, getting some fresh water up in the spray mechanism was all that was needed to unblock it, but it was frustrating. 

Anyway, I can see how an older toddler or preschooler would like this, but J was a bit too young.  I should’ve just let him paint with paint brushes.  Afterall he had a 4 foot wall of canvas after the driveway was shoveled!

Age?  21 months, but it would work better when he’s older and can work the spray bottle himself

Try again?  Yes,but probably not until next winter at least (he’ll be 2.5); it’s easy to prepare and no clean up necessary