Category Archives: Rainy Day Activities

A Simple Dot Marker Activity

Yes, I am rather cheap and I tend to save everything.  I’m always contemplating what activity we could do with would-be trash. 

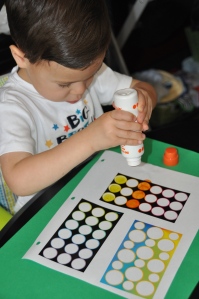
As J finishes sticker sheets, I often peel the remaining border and stick it on a sheet of paper.  It’s saved for some random rainy day… or days spent inside with a colicky (but adorable) baby. 

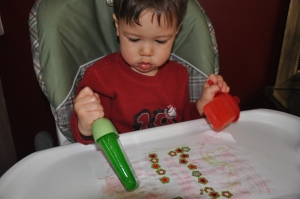
I gave J some dot markers and a border sheet of what had been a set of smiley face stickers.  Each empty circle was bordered with a different color.  I simply asked J to use the dot markers to fill in each circle with the corresponding color.  Simple, yet effective in entertaining while I fed his little brother.

Hidden Puzzles

This is such a great idea that one of my online friends, Karen uses with her toddler. I asked her to share her great idea for all to enjoy.  If your toddler hesitates to pull out those puzzles, this is a great way to add some interest.  Thanks Karen!   

Not your same old boring puzzle….

Age attempted: 25 months

 Materials needed:
Shoe size clear plastic tub with lid (for storage)..I bought at dollar general for $1.00
Large bag of uncooked elbow macaroni
½ bag of dry beans
Puzzle of your choice (I use Melissa and Doug’s See-Inside Numbers Peg Puzzle http://melissaanddoug.com/see-inside-numbers-learning-peg-puzzle )

 Directions:
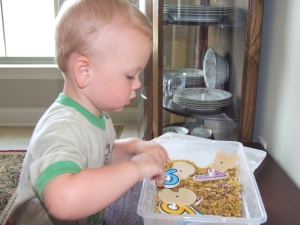
1. Pour the bag of noodles and ½ bag of beans in the tub
2. Pour out an age appropriate puzzle into the tub with mac and beans
3. Have the child hide the puzzle pieces in the mac and beans (or you can show them the first time)
4. Have the child find the pieces of the puzzle and put them into the puzzle board in the right places

I like to put the tub on a child’s table at the child’s reach and the puzzle board on the floor so it’s an up and down work out (but it’s not necessary).

I’ve been doing this with my two year old with a number puzzle he had ZERO interest in. I figured the tactile mac and beans would get him interested in learning his numbers and it was an instant success! We’ve only been doing this for two weeks and he can already find most of numbers in order.

The first time you do this you may want to let your little one explore the mac and beans before pouring in the puzzle pieces.

Alternative: use oatmeal and/or rice in the tub to hide puzzle pieces. 

Mother May I?

Remember this game?  It’s really a great game that keeps toddlers and preschoolers entertained quite well.  My mom actually taught J how to play while I was in the hospital after his little brother was born.

It’s actually great practice for them in counting, size, gross motor skills and of course following rules since they have to return to start if they forget “Mother may I?”  It made me think, if J can follow the rules to this game well, there’s no excuse for him to forget to follow our house rules like saying “please” or “thank you”,  “May I get down now?” or “May I go upstairs now?” and the list goes on and on…

How to play:  Designate a starting spot and finishing spot.  You stand at the finish line and have your little one stand at the start. You call out different type of movements for them to make as they move towards you.  For example, “Take 3 giant steps,” “Take 2 bunny hops,” or “Take 6 skipping steps.” Get creative and have fun with the commands!  They must first respond with “Mother may I?” before following out your instructions.  If they forget to say “Mother may I?”, they have to return to the beginning to start over again (which is sometimes part of the fun for J!). 

J and I take turns.  Sometimes he gives the commands and sometimes I do.  Either way, it makes for great and cheap fun.  This is something you can play while waiting in the doctor’s office, in a hotel room, while you’re cooking dinner, feeding the baby,…  You gotta love these good old fashioned activities that required nothing! Why do we make things so intricate today?? It’s really not all that hard to entertain kids J

Flower Mobile (or possibly placemat)

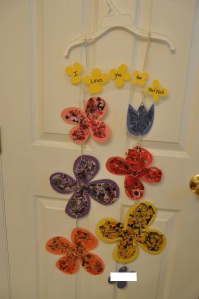
J made a flower mobile for his grandma as a get well soon gift.  It would be a great gift for any girl on any occasion really. I think it turned out really cute and J had a lot of fun creating it.  He stuck with it until it was all finished!

What you need:  Construction paper, contact paper, scissors, flower magazine, marker; you will also need a  hangar, a hole punch, and string if you want to create the mobile

Prep Work:  I cut out the borders for each flower, using different colored construction paper.  I also cut out two equal sizes of clear contact paper, taping one to the work-table (sticky side up).  The other piece of contact paper is saved to place on top after the flowers are completed.

During the activity:  J placed the flower-borders onto the contact paper though he needed some help with the larger pieces since they can get tangled easily.  He then searched through a flower magazine to find flowers to fill each border, matching the colors accordingly.  I just had him tear the pictures out of the magazine rather than using scissors.  We then worked together to tear the pictures into small pieces that he could stick inside the corresponding colored flower.  After all of the flowers were filled, we added a message for grandma and J signed one of the flowers himself.  I then placed the second sheet of contact paper on top.  If we were creating a placemat, the activity would basically be done. Just trim the edges of the contact paper to make a more finished look.  (My intention was to create a placemat, but I did not plan well.  The flowers were so huge that the placemat covered half the table! So I improvised and decided this was going to become a mobile instead.)

For the mobile:  I cut apart each flower and punched a hole into the top and bottom.  I also cut small pieces of string to attach the flowers together.  J helped thread the string through the holes and I tied the knots.  We then tied it onto a hangar. 

Age attempted: 3 years

Mix and Match Patterns with Plastic Eggs

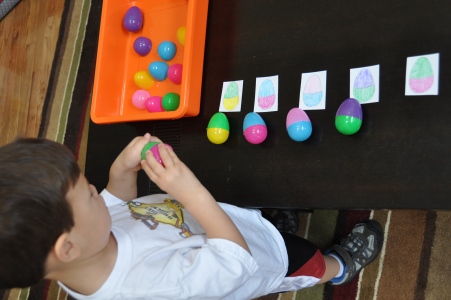
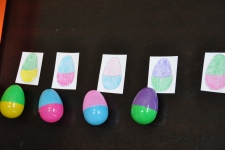
Here’s an activity where I’m guessing you won’t have to spend one dime, just use what you already have!  Plastic eggs, crayons, and paper.  This was a great activity I found online that I prepared and stored away for after the baby was born.  I first gathered the plastic eggs from the basement so that I knew which colors I had to work with.  I then colored some mix and match eggs on cardstock. 

I gave J both the cards and the plastic eggs and told him his job was to create eggs to match the cards. 

This activity offered practice with color recognition, size recognition and fine motor skills.

For younger toddlers/preschoolers:  They might need help clicking the egg pieces together, but they can find the correct colors themselves.  Some might not yet be able to recognize the size difference in the top/bottom of the egg.

For older toddlers/preschoolers:  They can practice placing the eggs together themselves.  To add a level of difficulty, be sure to make it clear in your drawing which part of the egg is on top and which is on bottom.  This way they not only have to match the correct colors but also the correct part of the egg. 

Age attempted: 3 years

Sally’s Cozy Cone Motel

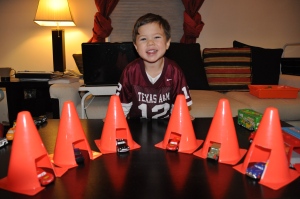
I bought a set of orange cones last Spring in Target for $1 or $2.50 (by the way, I saw the same set in the store this morning).  We’ve used them both outside and inside for obstacle courses or even as an easy way to tell J how far he’s allowed to go down the sidewalk. 

This winter, I cut doors into each cone and created Sally’s Cozy Cone Motel (from the Disney movie, Cars).  How easy is that!  J loves the movie and knew exactly what they were.  He’ll often want to put his cars to sleep at night in their Cozy Cone.  A simple change to an old toy to bring it to life again and add to a toddler’s pretend play!  We can even still use the cones for their normal uses. 

I think this would be a fun addition to a homemade highway.  We might just have to break out the painter’s tape again!

If you DON’T like traditional shape cookies, try these!

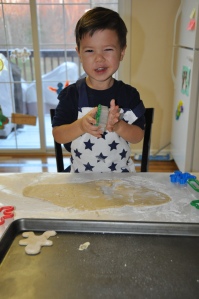
I never posted about our Christmas cookie baking, but we sure did A LOT of it.  I think baking is one of those activities where they can learn a lot (if we slow down enough to let them) and where they see a great reward for their efforts. 

Of course it’s easier, cleaner and faster to mix up the cookie dough on your own, but I’ve found that the majority of learning comes from allowing J to help mix the dough.  He “reads” the recipe, gathers the ingredients and then measures them, allowing him to practice tons of skills. 
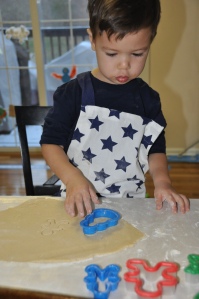
We of course made the traditional sugar cookies where we rolled the dough out, J cut them into fun shapes and then decorated to his hearts content.  This is NOT my favorite type of baking!  J loved it, but it’s honestly quite stressful to me.  I try to stay calm, but I’d just rather not deal with the rolling and the cutting.  I think J would have as much fun with playdough and mom wouldn’t have the mess afterwards. (And I don’t even like the taste of this these cookies either!)

We honestly might stick to playdough in the future. BUT all cookie baking is not lost.  We did have lots of fun baking other types of cookies (or I should say we BOTH had fun with other cookies).

My favorite type of cookies to make with J this year were those with a “surprise” inside.  Once I realized how perfect these were for J’s age and ability level, this is mostly what we made to give away to neighbors and teachers. 

I scooped the dough onto the baking sheet and J pressed each ball with the back of a teaspoon, creating a small hole.  He could then “bury” a surprise inside each cookie and I helped him cover it up with the dough.  This was right at his ability level and he loved it.  We buried Rolos, Reeces Pieces, Reeces PB Cups, Chocolate Kisses, and M&Ms (not all in the same cookie!).  I also let him sprinkle crushed toffee and confectionary sugar on top of some which he liked. 

And the good news is they taste great afterwards.  You can hide them in basically any type of cookie dough and it will taste good. 

Age attempted: J first helped with Christmas baking when he was 20 months; this year at 32 months he could do A LOT more

So here are some of the recipes we tried for Christmas:

Million Dollar Caramel Cookies (These were by far my favorite!)

Snowball Surprises

PB Surprise Cookies (basically chocolate chip cookie dough but hide PB cup, M&Ms, Rolos, whatever candy you want inside)

Molten Lava Cookies

**I hope these are the same recipes I used; I just did a online search for the names of each, but the pictures looked very similar in all cases… that should count for something right!**
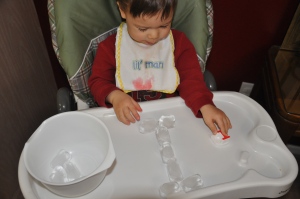
Color Mixing with Ice

When I was pulling up the old activities using ice, I realized that I never posted this last summer (I took a LONG break back then!).  These photos are from this past summer.   This is a great outdoor activity but a few simple adaptations can  easily bring this activity inside during the winter months and actually works well with a winter theme. 

(I honestly just copied this post from the one I wrote for our private family blog last summer.  I made very few adjustments – in italics – which is why it sounds like I’m writing from the perspective of summer…. I was!)

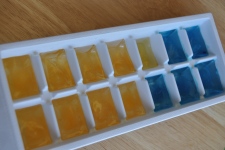
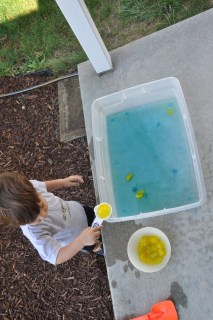
J’s homemade water “table” is still one of his favorite activities of the summer.  A few days ago we made yellow and blue ice cubes together.  This is an activity all in itself and a great way to teach the process of freezing. Let them fill the tray using a scooper or a medicine dropper to include some fine motor skill practice!  He’s been patiently waiting to play with them since. 

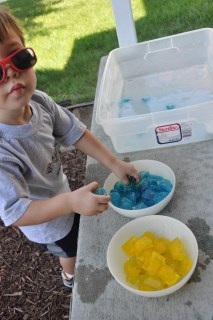
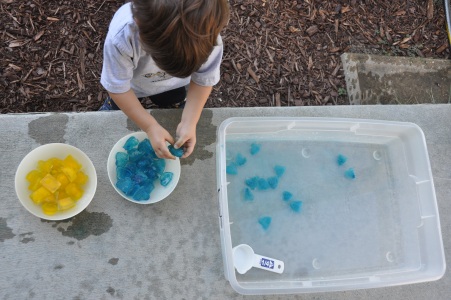
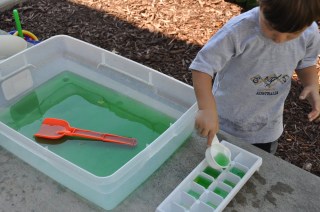
He first separated the ice cubes into bowls by color and chose to make blue water first.  I filled the tray with a small amount of water (just make sure the tray is white/clear so you can easily see the water change colors as the ice melts). He really enjoys scooping and stirring the ice cubes, letting them melt in his hands,… **Use this step to utilize motor skill practice with tongs or different size (and length) scoopers or spoons.**  I’m surprised at how long a little ice can entertain!  When he moved onto the yellow ice cubes I asked him which color the water (currently blue) would become and he of course guessed yellow.  I told him it was going to be a surprise that he’d have to wait and see.  He wasn’t convinced the water was actually green until the very end when there was no denying it.  He was sure it should be either blue or yellow! 

(Sorry, I kinda cut off his face!)


We then filled the ice cube trays with green water to play with in the future.  This activity is free, entertains a good while and recycles itself too!

Favorite Ice Posts

These ice activities from last year would work well during winter. I have a few of them on the list to do again this year.  Click on the picture to see more about the activity.

Melting Hearts

Ice Painting

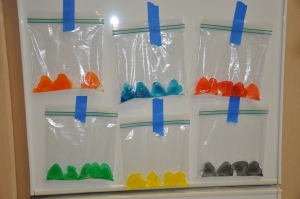
Ice Melting Bags

Ice Blocks

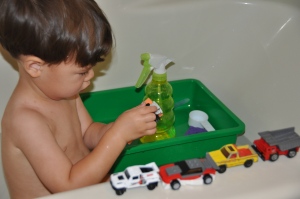
Mini Car Wash

I recently read Val’s post about surving the winter with extra fun at bath time (see it here) and was reminded of how I used to set up a car wash for J’s cars.  It keeps him busy.

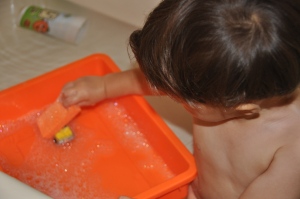
You could do this in the bathtub, near the kitchen sink, outside in the summer or wherever you’re brave enough to try.  J gets a “dirty” bin, a wash bin, and rinse bin.  When he’s in the tub I leave off the rinse bin and he just rinses them in the tub. Our bins come from the Target dollar section (or maybe their $2.50 section??). 

The cleaning supplies he gets is random, a spray bottle, sponges, a dipper (measuring cup), a medicine dropper and a toothbrush all work well though they definitely don’t need all that.  He typically lines up all the cars, spray them down, soaps them off with a sponge, rinses and then line them back up (either to be washed again or to “dry”).

You could have them wash their “pets” (plastic animal figures) or girls might like to give their dolls a bath.

Age attempted: These photos are when J was 29 months old; this could easily be done by pretoddlers and might even be entertaining for preschoolers (no experience there yet!)